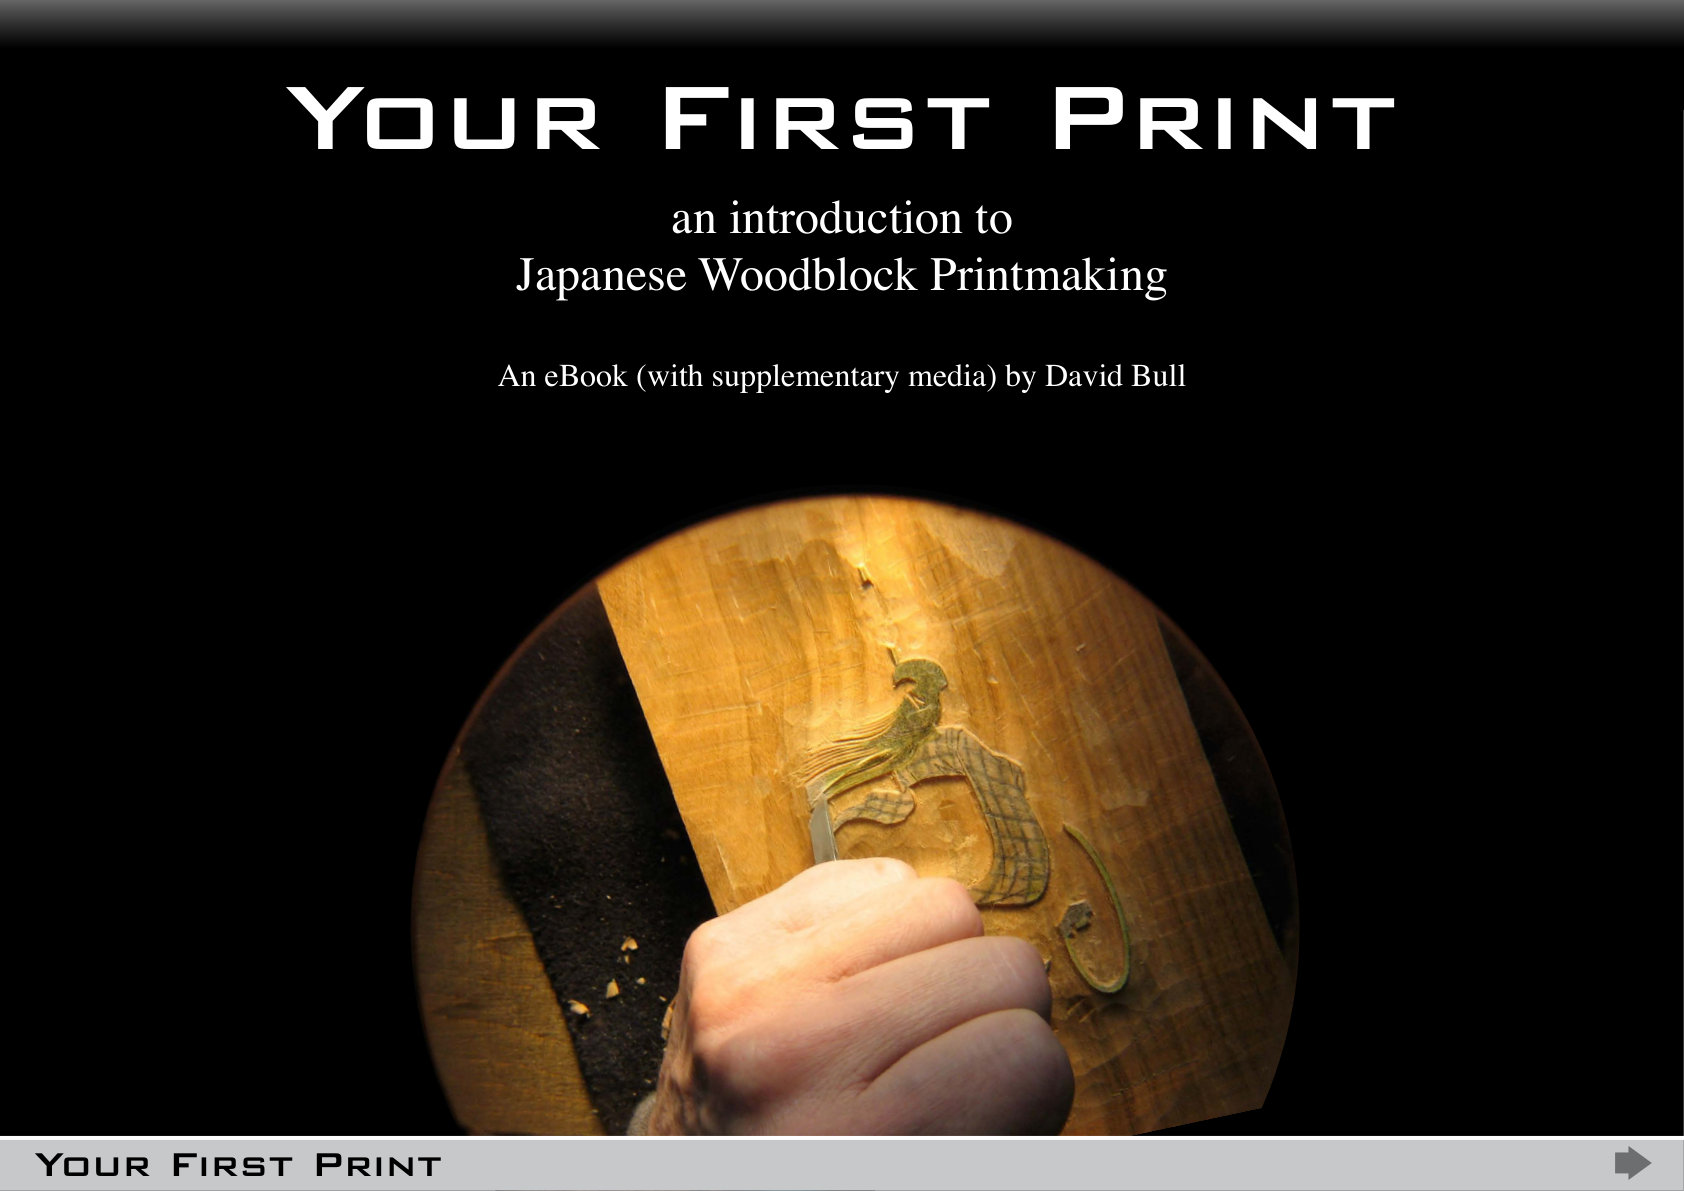
An introduction to Japanese woodblock printmaking · David Bull
Introduction
How to use this bookpdf p.1
”Is this a ‘book’ or a ‘website’? How do I move around? Is the content presented in serial fashion, or in a more convoluted layout?” The content is presented in single-view spreads in a horizontal format that matches most viewing screens. Adjust your viewer window to match the spread you are looking at right now (the book is ‘zoomable’ to whatever size you wish to use), and then simply use the arrow keys on your keyboard (or click the arrows at the bottom of the book spreads.) No left-right or up-down scrolling should be necessary at all.
Thank you for your purchase of my book. I sincerely hope that it will be useful in helping you make some beautiful and interesting woodblock prints! Before you dig in and start reading, there are a few things you should know about how this all works.
[Navigation] The Table of Contents (the next page) is your overview of what is contained in this book, and is ‘hot-linked’, allowing you to jump to any target instantly. ‘Breadcrumbs’ located at the top left corner of every spread show where you are at any given moment (and are clickable for jumping). In addition to all this, the ‘Search’ function of your pdf reader will also be very useful in finding particular items of interest.
[Rich Media] This is a Rich Media eBook, which means that it contains audio and video content. [Update - 2nd Edition] With the demise of the Flash technology with which the 1st Edition of this book was constructed, media playback has changed in this edition. Although Flash developed a bad name, it did have merits, one of which was the enabling of media playback within the .pdf reader itself. Now that it has been removed from modern computers and tablets, there is no easy platform-agnostic solution to provide that function. So for this new edition of the book, the media files are not included together with the .pdf file, but have been stored on an internet server, and linked from here. This has the advantage of making this book much ‘lighter’ and easier to download, but of course means that in order to view the media files, an internet connection must be present.

[Audio] The presence of audio content is indicated with the headphone icon. Clicking it will jump you to your web browser, which will access the file. The audio can then be played, paused, or stopped as desired.
[Video] The video clips look similar to the photos that are scattered through the book, but are identified as ‘Video’ in the captions (and are accompanied by a small icon of Boots-chan, our project mascot!) Clicking the image will again jump you to your browser to play (and control) the clip.
[Photos] The photos in this eBook have been embedded at a high resolution, and can be ‘zoomed’ to inspect a good level of detail.
Dave Bull Tokyo Japan, Autumn 2009
About the authorpdf p.3
I am an English-born Canadian, and make my living as a woodblock printmaker, working out of my home workshop, the Seseragi Studio, in a suburb of Tokyo. I first toyed with woodblock printmaking while living in Canada, making a few prints as a hobby in the evenings while holding down a day job as a business manager in the school music industry. Although those first experiments were very clumsy - there were of course no guidebooks or other instructional materials available back then - my interest gradually deepened, and in 1986 I quit my job and moved to Japan with my two young daughters and their mother. At that time it was inconceivable that woodblock printmaking would provide an income, and I supported the family by opening an English ‘school’ in our apartment, while pursuing printmaking in my spare time. I visited the famous Yoshida school for a couple of months in the fall of that year, but although they were very friendly and open, I myself was specifically interested in the classical ukiyo-e techniques, something not their area of expertise. So I left and continued ‘studies’ on my own. I use the word ‘study’, but this simply consisted of repeated trial and error printmaking, making occasional visits to older craftsmen to garner what advice I could.
After a few years of this, my skills had slowly progressed to the point where people were showing interest in the prints I was making, and in 1989 I began production of a series of 100 prints based on the old Hyakunin Isshu depicting poets of old Japan. That project slowly gained attention, and by 1991 I was able to close the English school, becoming a professional printmaker. The long project finished in 1998, and since then, I have created a number of varied woodblock print series:
- » Surimono Albums : 1999 ~ 2003

- » Beauties of Four Seasons : 2004
- » Hanga Treasure Chest : 2005
- » Scroll Project : 2006
- » Small Print Collection : 2006 Nearly all of the prints in these collections were designed in the Edo and Meiji eras by various artists. I worked in ‘collaboration’ with these men, carving and printing their designs, just as the craftsmen of the Edo period worked together with the artists of their day. In 2007, I began work on the ‘My Solitudes’ print collection, which - in a major step for me - was a series of prints of my own design. As I write this, in October of 2009, I have no idea what project will come next.
The Preface FAQpdf p.4
“Why do I need this book?” In recent years, there has been an explosion in the amount of material available to the person who wants to learn about Japanese woodblock printmaking. Both on the internet and in printed books, the beginner has access to so much information that it can be difficult to know where to start. That is where this book comes in. Remembering back to the days when I was first exploring this craft, I have created the book that I needed back then, but which didn’t exist - a book that included everything that I needed to know, and excluded everything else. This is not an ‘Encyclopedia of Japanese Woodblock Printmaking’. It is a guidebook that will take you completely through the process of creating your first print, answering (hopefully) all the questions you will ask along the way.
“What will it cost to make my first print?” If I were to total up the cost of all the tools I use in the production of even the smallest prints I make, it would probably be rather discouraging for you. I am a professional, so of course I have many expensive professional tools. But even student-level tools for Japanese printmaking can be expensive, and this can be a big barrier. So a major consideration kept in mind while preparing this book has been keeping a pragmatic approach - wherever possible using tools and materials that you probably have already at hand. I am not a ‘snob’ about any of the traditions of this craft; for your first print you do not ‘need’ a knife with a $50 Japanese blade; you can use a cutter knife from the drawer in the kitchen. Once the print is finished and you have fallen in love with this whole process, then later - if you are so inclined - you can think about some nice tools to make the work more pleasurable. Later. If you have a normal household, with a few tools in the garage, and cupboards with the usual family assortment of odds-and-ends, you are going to spend almost nothing on this project. (But I am going to ask you to get some nice Japanese paper - that will be a non-negotiable demand. We’ll talk more about that later ...)
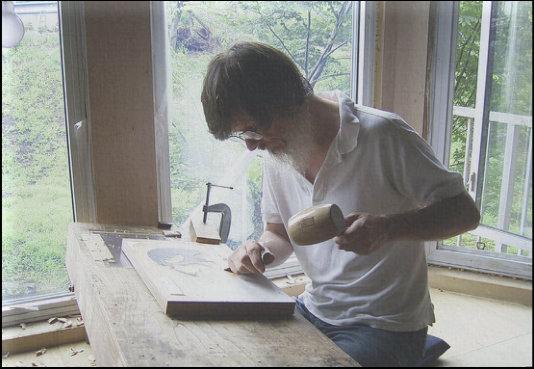
“Do I need a special workplace?” Nope. This is going to be a ‘kitchen table’ project. And actually, that’s not far off the amount of space that the professionals in Japan require. Remember, there is no press involved, just a few simple hand tools. Keep the stuff in a box somewhere, bring it out when you have an hour or so for the project, then pack it out of the way. There are no oily pigments that need solvents to clean up, nothing toxic is involved at all, and you’ll make nowhere near the kind of mess that I did just while preparing dinner last night.
“Do I have to make a ‘Japanese’ print?” If you are talking about the design - the content of the image - then no, of course not. This is an important point to make: this book gives an overview of the process of mak-
“How long will it all take?” That’s tough to answer. For a print of the pretty straightforward kind of sample design we have in this book project, to go from sitting down to work out the design, right through to stacking a pile of (say) 50 finished prints in the batch, I would be looking at maybe two working days. You are going to take a lot longer. But it’s kind of an irrelevant question, because - for the most part - it can be done on a ‘stop-start’ basis. If you intend to make substantial editions, then once printing begins you will have to organize some blocks of time for that, but other than that, just work on it when you have time; put it away when you don’t.
ing a woodblock print using traditional Japanese techniques, pretty much as
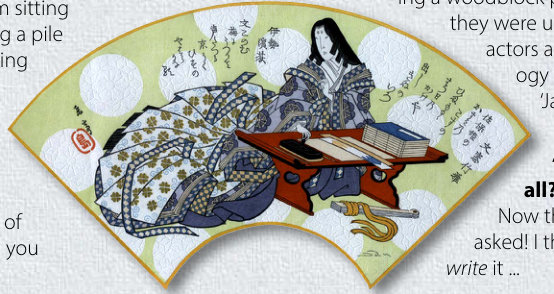
they were used in the old days to make those famous prints of kabuki actors and Yoshiwara courtesans, but there is nothing in the technol-
ogy that will result in your finished print automatically becoming
‘Japanese’. We’re going to cut some shapes on pieces of wood, brush pigments over them, put paper on top, and rub it.
“Then why should I be using Japanese techniques at all?” Now that’s the first really interesting question you have asked! I think I’ll tell you the answer, rather than try and write it ...

Japanese Printmaking
I’m presuming that because you are here reading this - a book on ‘How to Make a Japanese Print’ you have a basic familiarity with the ‘concept’ of what a Japanese print is. It seems to share a basic technology with printmaking practiced in other cultures - cut shapes on wood, ink them, print them - but differs in some fundamental ways from almost all other traditions.
No oil-based inks are used. This has huge ramifications. The oil inks used in Western printmaking are - for the most part opaque. The water-based pigments used in the Japanese tradition are transparent. Overlaying of colour thus becomes very important, and even after a few layers have been applied, one can still see ‘all the way down’ to the paper at the bottom.
Moistened, absorbent paper is used. For some Western printmaking - silkscreening is one example - the paper has no role to play beyond acting as a ‘carrier’ , something to put the ink on. It is a plain white backdrop on which a scene is shown. In the Japanese tradition, this is turned upside-down; the paper is the print. The pigments are pressed right down among the tangled mulberry fibers, and the texture of the paper surface remains palpable in the finished object.
No press is used. In the early days, hand-rubbing was the norm for Japanese printmakers because that was all they had, but it remains the standard technique today for a few reasons:
- » the pigment on the block dries quickly, and there is simply not enough time to prepare the pigment, place the paper, make adjustments, and roll it through a press.
- » Japanese paper is crushed by press action, and loses the essential surface texture.
- » the printer ‘feels’ the surface of the block with the rubbing tool (the baren), and infinite possibilities for applying pressure mean that an infinity of interesting effects are available.
The ‘key-block’ methodpdf p.6–7
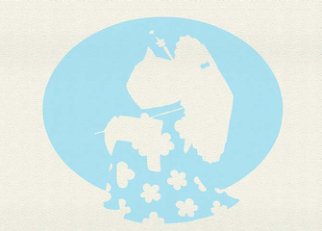
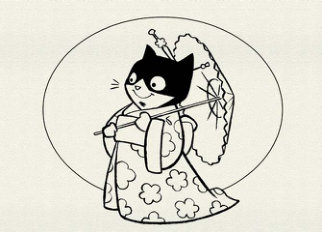
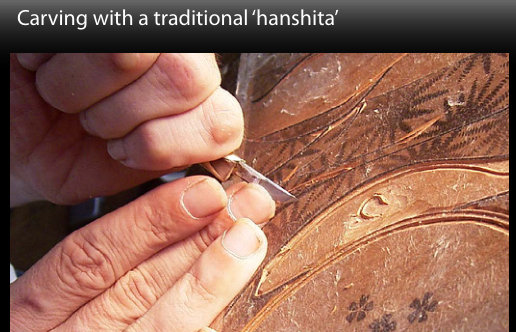
The most interesting aspect by far of the traditional outline-based woodblock print, is the fact that until the final colour has been printed, no one - not even the designer - will ever have seen the image in its entirety. An outline drawing exists at one stage, so the general shape of the image is clear, but just how it will look in final ‘full-colour’ splendour is something that only exists in the designer’s mind. It’s much like the creation of a piece for symphony orchestra - the composer himself can presumably ‘hear’ the piece, but until all the parts have been copied, the musicians assembled, and the conductor’s downbeat comes, the music doesn’t have any actual existence. Here’s a basic overview of how the prints are made (each step will be covered in much more detail later). The first step is of course a sketch of the design. Although it is indeed possible to dispense with this, and simply attack a piece of wood with some sharp tools, the traditional methods use a prepared sketch. Once the design is ready it must be translated into a form suitable for cutting on wood. One common way to do this is to use a thin paper (tracing paper, or a thin Japanese paper known as minogami) and, using brushes or pens, carefully draw each of the lines. The image is not reversed for the woodblock, but drawn in ‘normal’ orientation. No indication of colouring is made at all. At this point, nothing but the outlines are needed. In addition to the image itself, it is necessary at this point to add the two registration marks (kento). These will be carved onto the wood along with the design, and will enable the paper to be placed in precise position for printing later. This finished sheet is known as the sen-gaki (outline drawing) or the hanshita (tracing for carving). Here’s a sample - using a drawing of our Boots the Cat mascot, prepared by British illustrator Mark Mason.

The hanshita is pasted face down onto a suitable piece of wood, and it is this face-down orientation that performs the essential step of reversing the image for the block. Because a thin paper is used, the drawing is clearly visible through the paper.
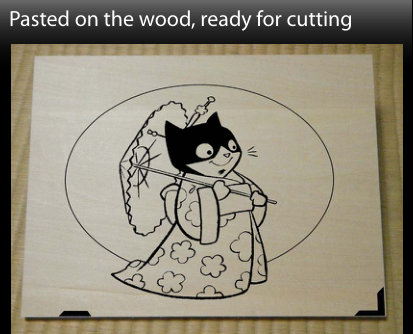
The block is then carved, cutting around each line to leave the dark areas untouched, removing the ‘white’ places. (We’ll of course cover all the details of the process later on ...) At this time, the registration marks are
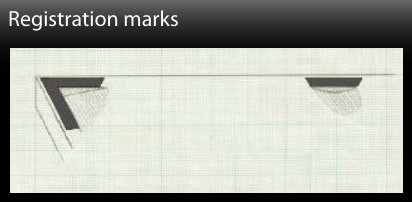
Once this ‘key block’ is ready, work on colour separations can begin. A number of impressions are first printed from the key block - as many as there are to be colours in the final print (plus a few for ‘extras’ ...)
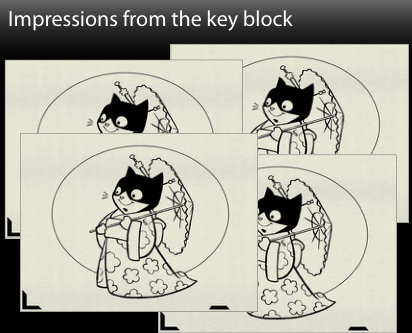
One point of confusion for beginners comes up here these impressions are not printed in the ‘normal’ way, with the paper inserted into the registration marks as common sense would dictate, but are printed with the paper laid over the entire piece of wood. Pigment must be rubbed over the whole block including the kento marks. In this way, the placement of these registration marks will be transferred to the colour separation sheets, (continued on next spread)
(continued from previous spread)
allowing matching marks to be carved in the corresponding locations on the colour blocks. (If this registration system seems confusing at this point - it is difficult to describe in words be sure to watch the printing videos later in the book to see how it works in action.) Once the sheets have been printed, a strong marker is used to carefully fill in the appropri-
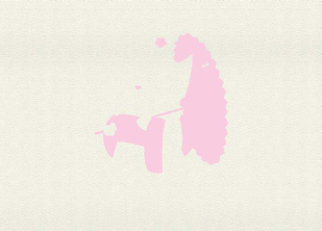
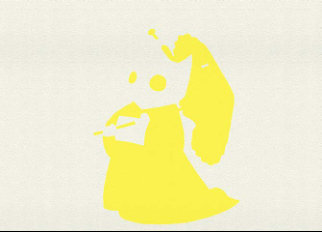
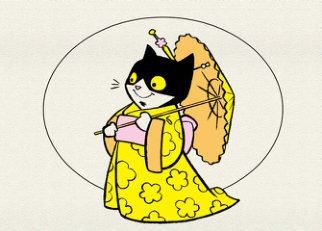
ate area(s) on each one - we colour in the zone that will be needed to print that colour. Any areas that are coloured on more than one sheet will become areas of overlaid colour (Boots-chan’s kimono, the cuffs, inside the umbrella). Any areas left blank on all the sheets will appear as blank white areas in the finished print (her face and hands, in this example). It seems a bit surprising when you see it at first, but these colour separations are made, not using the actual tones that are expected to appear in the final print, but with any strong marker that is handy. All we are doing is defining the areas to make it possible to carve the block, we are not mixing colours yet. Each of the finished sheets is then pasted down on a fresh piece of wood - again face down - always face down - and these are then carved. Carving a colour block simply consists of removing everything that isn’t coloured by the marker - out to a distance of about 3~4 cm away from the retained areas. The registration notches are also carefully cut, and will thus match exactly the ones originally carved on the key block. Once all the cutting is finished the printing process begins, and this follows the same general order as the carving - the key block first, the colours next. In this way, each colour block can be carefully adjusted so that the colour will fit exactly between the outlines. So in this example, four impressions serve to produce a print of six colours, due to the areas of overlap between colours. Note that the colour blocks span wide areas, including places where black is printed - the yellow kimono area, for example. But because the pigments are transparent, those black lines show through clearly in the finished print, even though the colours are printed on top of them. This ‘key-block plus colours’ method of working is capable of producing prints of astonishing complexity, as any glance through a book on traditional Japanese prints will show ...
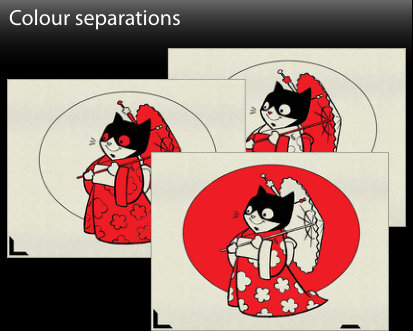
Printing always begins with the key block, and the colours are then fitted in place, one by one, building up to the finished image. Four impressions are here creating a print with six colours, due to the overlapping of the transparent pigments. This simple process is exactly how the famous prints of old Japan were made ...


Tools
As I mentioned back in the introduction, I use quite a few specialized tools, and some of these because there are so few makers left - are ridiculously expensive. For the beginner, these are not ‘necessary’, and simpler/cheaper alternatives can be used, but this leaves me with a problem: which do I use to illustrate the process in this manual - my own expensive tools, or the ‘household’ alternatives? Do I show how it’s done ‘properly’, or show something ‘practical’ for the beginner? I expect that you will be able to bring a pragmatic approach to this, so in many of the photos you will see me using my normal tools; I am going to assume that you can look at what I am doing, and ‘work out’ something for yourself that will accomplish the same end. For an example, in the photos that show me cutting the outlines of the keyblock, I am using a knife with a blade that cost around $50. The $50 is not relevant to ‘your first print’; what is important is the overall concept of what I am doing - study the angle of the knife in the wood, how deep I am cutting, and what the process is trying to accomplish. Then, with that information in mind, pick up your $2 cutter knife, or whatever tool you feel can do the job, and get to it.
In this section, we’ll look at tools for both cutting and printing: Cutting
- The knife : cutting the lines
- Gouges : clearing major waste
- Chisels : cleaning up
- ‘Sosaku’ type cutting tools
- Sharpening Printing
- Brushes for printing
- Water brush, pigment ‘brushes’
- The Baren
- Baren maintenance
- Baren recovering
The Knifepdf p.9
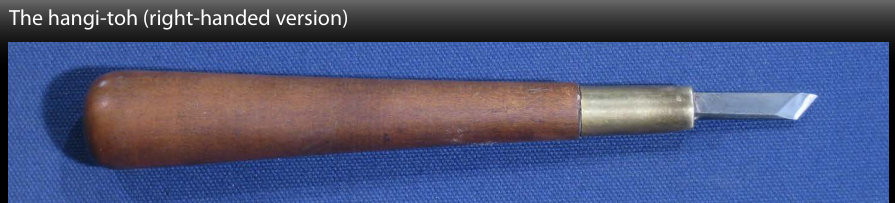
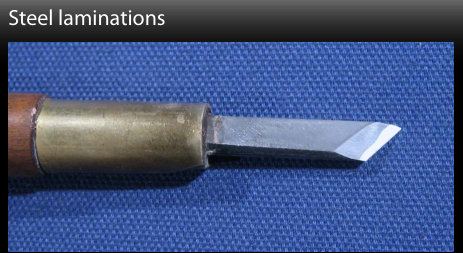
Hangi-toh Pronounced ‘hang gee toe’, and also known as the ‘chokoku-toh’ or more simply ‘toh’, this is the basic carving knife that forms the heart of any set of carving tools for woodblock print making. It is the only member of the set that is asymmetrical, and thus comes in both left-handed and right-handed versions. It is commonly available in sizes from 1.5mm up to 9mm in width. (This photo is of a 6mm ‘standard’ size, right-handed type). The handles of these knives are made of a hard wood. The blades fit into a small slot cut into the handle, and are held in place by a ring of brass. This ring may be easily slipped off to allow the blade to be slid forward as it becomes worn down through repeated sharpening (and then eventually replaced). I have to mention something about the special way in which nearly all Japanese cutting tools - from mundane kitchen knives right up to exotic swords - are made. A blacksmith making any particular blade is faced with a trade-off when he selects his steel. If he chooses a type with a relatively high quantity of carbon added to the iron, the blade will be very hard, and capable of being sharpened to a keen edge - but it will be quite brittle, and easily broken. If he chooses a low carbon type of steel, the blade will be much less likely to break or chip, but it will be too soft to hold a fine edge. The Japanese blacksmith’s answer to this dilemma is to make his blades by using a lamination - a high carbon steel for the part of the blade that is to carry the cutting edge, and a backing layer of lower carbon steel for support. Ingots of steel of the proper size and shape are hammered together when in a near molten state, and the two layers fuse together into a single blade. The dividing line between them can clearly be seen in the finished tool - the area with the more ‘white’ and shiny appearance being the higher carbon steel.
Many people are confused about the bevel on the cutting knife. Question: should the flat side of the knife be touching the wood to be retained, or the bevel side? The answer is easy: the flat side, wherever possible. And for delicate line work, always. As the knife moves through the block, it compresses the wood on each side of the blade. A ship moving through the sea pushes the water away to each side of the prow, and our blade has to do the same thing. But because our knife isn’t symmetrical (imagine ½ of a ship) this compression is far more pronounced on the bevel side of the blade.
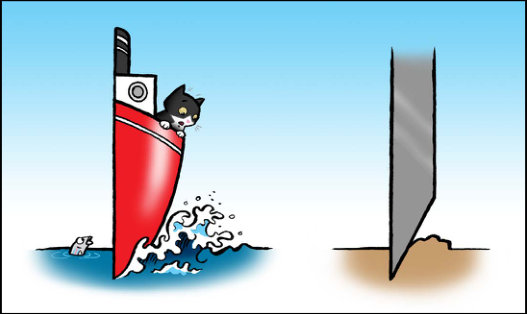
And with our knife usually being tilted slightly towards the retained wood when cutting, ‘push-up’ of the waste becomes even more pronounced. If the bevel side of the knife were to be held against the retained wood, this would compress the wood, which would then later absorb moisture from the pigments and ‘spring back’. When this happens, the cut lines expand in size, and all delicacy is completely lost. If you are carving colour blocks in soft shina wood, this change in dimension may be completely inconsequential, and you can hold the knife anyway you wish. But when you are cutting line work, and especially if you are using a hard wood, please pay attention to this. Use a left or right model of knife as appropriate. (I’ll include more details about this on a later page.)
Gougespdf p.10
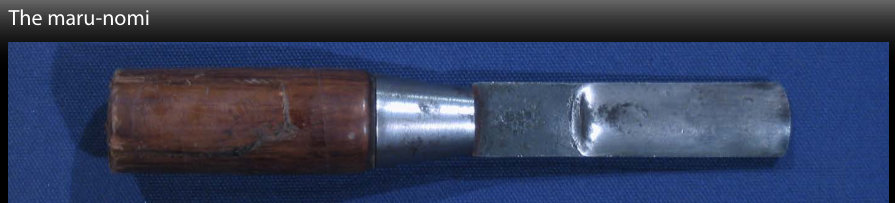
Maru-nomi The word means ‘round-chisel’, and unlike all the other tools mentioned so far on this page, this one is used with a hammer or mallet. The blade has a ‘U’ shape when seen face on. Typical sizes range from 4.5mm up to 15mm, in two general types - shallow or deep. They are used to remove wood from areas ‘in between’ carved spaces, where the wider flat chisels (below) can’t fit. Round chisels are made in two types - with the bevel inside the curve, and with it outside. The one you need for our kind of work is the ‘outside’ type.
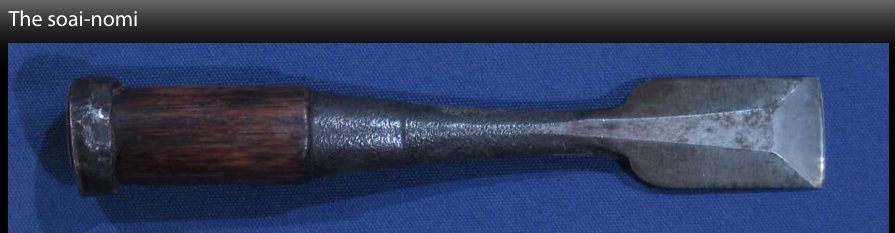
Soai-nomi (so ah ee no mee) The word means ‘clearing chisel’, and these too must be used with a mallet. Their function is to quickly and efficiently remove wood from around the printable areas. These chisels range in size from 9mm to 30mm, with a 21mm width being perhaps the most common. It seems to be not very common for inexperienced printmakers to use larger chisels like this; they tend to use the smaller chisels (see next page) for clearing all the waste on the block, even in wide areas. Well, it’s your choice of course; the small chisels can do the job, but I have to say that for me, working with one of these beauties - with a nice mallet - has become one of the most pleasureable parts of the whole process!
The Mallet For the first half-dozen years or so that I made woodblock prints, I had no mallet. I used smaller hand-driven chisels for removing all the wood, even from larger areas. But watching an older carver one day really opened my eyes to how thoughtless this was. He had a nice broad chisel (actually, the same one you see in the lower left photo, which was given to me after he passed away,) and drove it through the hard cherry wood completely effortlessly with his big fat mallet.

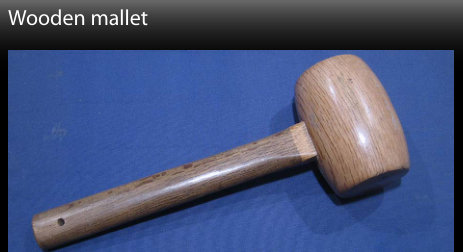
It took him no more than five minutes to clear an area that would have taken me hours. Now you’re probably not doing this for a living, so ‘time = money’ isn’t a factor, but part of being a competent craftsman - at any level - is letting your tools do the work for you, and a nice mallet certainly does that! And once I too started to do my clearing that way, with a wide chisel and mallet, I found that the resulting block was much easier to print. The bottom of the cleared area becomes free of the little ridges that are left behind when smaller tools are used, and this means that the printing brush doesn’t ‘catch’ in those places, leaving behind a build-up of pigment that would blot the print. So get one of these! (Anyway, you can never have too many tools!)
Chiselspdf p.11
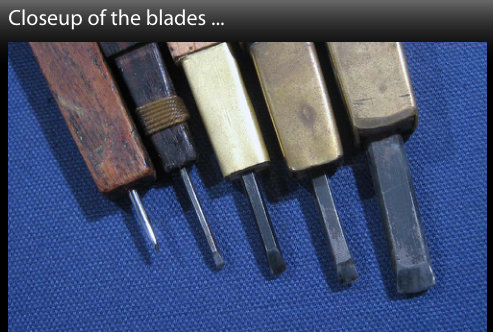
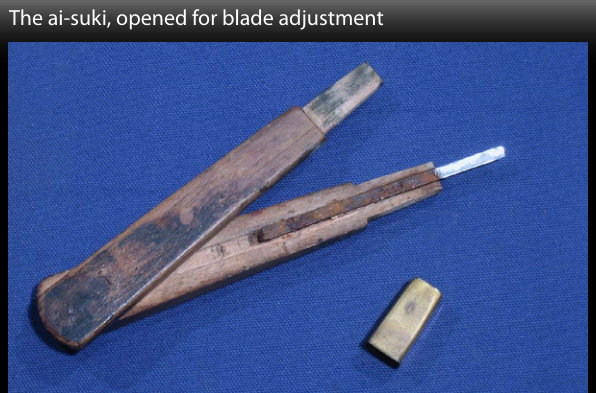
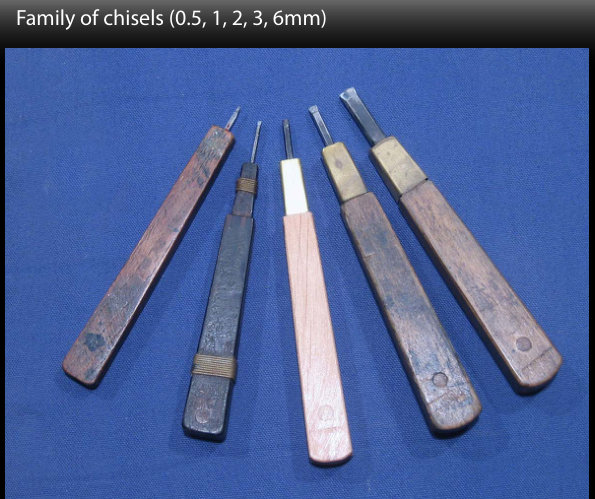
Ai-suki (ah ee soo kee) The word literally means ‘the inbetween becomes transparent’, and that may (or may not!) give a hint about how these chisels are used. They have a flat blade with a slightly rounded nose. The bevel is held down against the surface of the wood, and they are pushed forward to clear away wood from between lines carved with the main knife. Common sizes are from 1mm up to 6mm. The handle is usually made from a hard wood (sometimes bamboo), and is made in such a way that it can swivel open to allow the blade position to be adjusted after sharpening. Unlike the case with the hangi-toh, where the ‘extreme’ sizes are seldom used, the full range of sizes of the aisuki are in regular use. When it comes time to start the clearing work on the block, the carver is constantly reaching for the chisel that fits the particular space that needs to be cleared at any moment. For areas much wider than 6mm, the hammer-driven tools are used (see previous page), but for anything under this dimension, the aisuki does the job. In addition to the store-bought aisuki, which are usually obtainable only down to the 1mm size, many carvers also have a selection of smaller ones they have made themselves. A common type is made from a broken-off sewing machine needle inserted into a wooden handle and ground to a narrow point (the left-most chisel in the group of five pictured here is one of these). The metal such needles are made from is extremely resistant to breaking, and the point is used with a prying motion to dig in and ‘pop out’ the slivers of unwanted wood between neighbouring carved lines. The cutting edge of these chisels can be sharpened in a variety of ways. An experienced cutter will probably prefer the blade to have fairly pronounced ‘corners’. This allows him to run it right up to the lines previously cut with the knife, and trim away the excess wood in a series of strokes advancing along the line. But the price of this efficiency is the risk that pushing it a hair too close will chip the

line. Keeping the blade in a more gently rounded shape is much safer, although this way you will usually find yourself making multiple passes over any particular region, gradually sliding closer and closer to the line each time, to remove all the waste. The brass collar that holds the handle tightly squeezed together may come loose sometimes if the humidity in your area is low. It can easily be tightened up by putting a small shim of paper underneath.
Sosaku cutting toolspdf p.12
Woodblock printmaking is a very common hobby here in Japan. Classes are held in many community ‘culture centers’, and any library will have a good shelf of ‘how to’ books. Although the days when woodblock prints were the medium of choice for New Year cards are now long behind us (digital cameras and printing put an end to that!) and the craft is no longer a standard part of the elementary school curriculum, moku hanga is still very healthy here, and when compared to other countries, Japan is a hanga no kuni - a ‘Country of Woodblock Printmaking.’ What type of tool do most of these people use? The tools illustrated on the previous few pages are the dento hanga (traditional printmaking) type, developed by specialist craftsmen back in the old ukiyoe days. During the course of the 20th century though, as the sosaku hanga (creative prints) movement grew, a different style of tool was developed for use in this field, where the work was now being done by artists themselves, instead of trained craftsmen. These tools - illustrated on this page - have a longish blade driven into the center of a soft whitewood handle.They typically come in sets of around a half-dozen tools, with a selection of cutting angles represented: cutting knife, v-gouge, u-gouge, and a couple of bull-nose chisels. The blades are not replaceable like those in the traditional type; rather the wood of the handle can be carved back to expose more blade length as it becomes shorter from sharpening. The quality of these tools varies widely: good ones are made with the same high-quality laminated blade construction as the traditional knives, while the cheapest ones are nothing better than stamped metal, completely unable to hold any kind of edge. These sosaku tools are the most popular type for most hobbyist printmakers these days. A set of tools of this type would be an excellent way for you to try out woodblock printmaking, and - just to show you that they are indeed acceptable - I produced the sample print for this eBook using some of them, as you will see in the videos on the following pages.

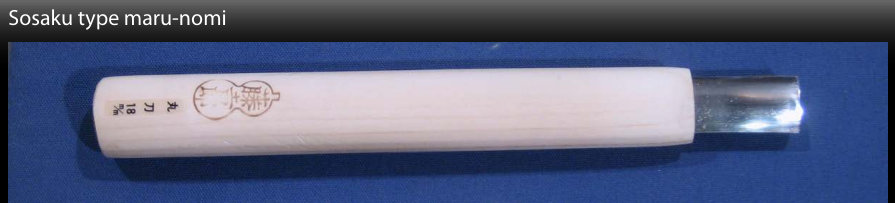
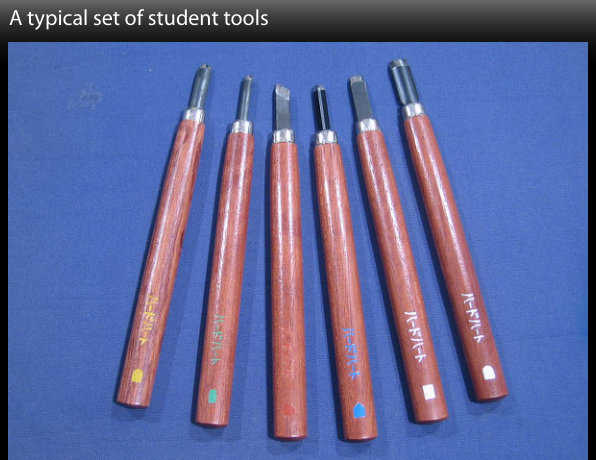
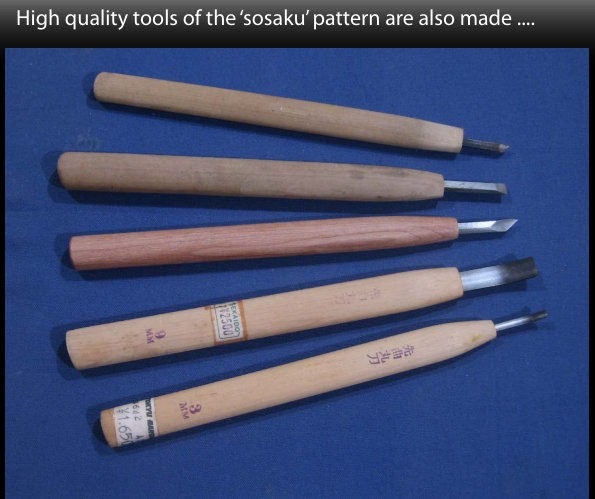
Sharpeningpdf p.13
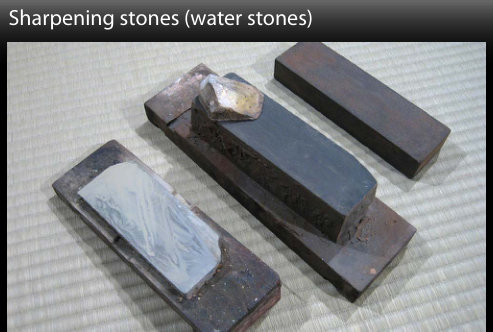
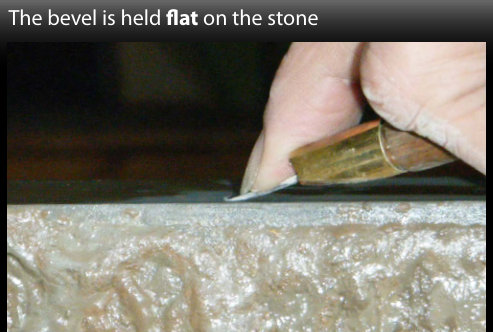
Sharpening is another of those aspects of printmaking that beginners make much more difficult than necessary. There is no reason for this at all; inexpensive waterstones are now available anywhere, and it requires only a small amount of practice to get to the point where your tools can always be in good condition for cutting. The professional will own at least four levels of stone: ‘rough’ for quickly removing metal when repairing chips on the blade, ‘medium’ (the workhorse stone), and ‘fine’ for the final dressing. An additional soft stone known as ‘nagura’ is used to whip up a nice pool of mud before beginning the actual sharpening. (These photos show my own professional stones, but the video illustrates how it is done using a hobby-level two-ply stone.)
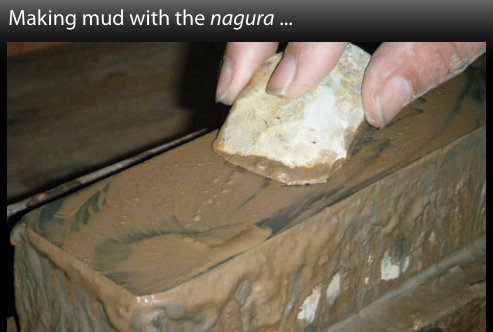
Some pointers:
- Japanese waterstones are not used with oil, like typical western stones, but with ... water. Dunk your stone underwater for at least a few minutes before beginning work.
- Keep the stone and tool wet throughout the process. Dab or dribble on more water as required, but not so much that you wash away the mud.
- You won’t need to use the rough stone very often; it is really only used when the blade is chipped or broken, or you wish to change the angle. In daily practice, work on the medium stone first when your tool begins to lose its edge.
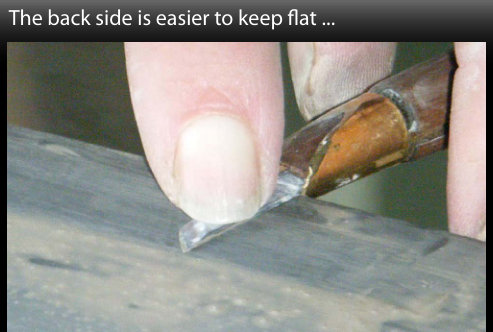
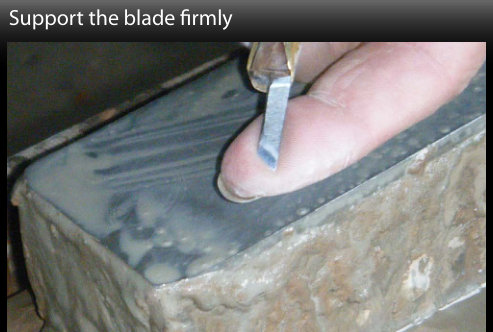
The overall process is straightforward:
- ‘Mate’ the bevel of your tool to the surface of the muddy medium grit stone.
- Rub it gently back and forth, making every effort to keep the tool absolutely flat on the surface.
- Stop when you have raised a fine ‘burr’ on the edge of the blade.
- Flip the tool over, and work on the back side. Don’t let it ‘lift up’, or the fresh edge will become rounded and dulled.
- Wipe the blade and repeat those steps on the fine stone.
- Get back to your carving!
Brushes for printingpdf p.14
First things first - the printmaker’s brushes are not ‘paintbrushes’, neither in the artist’s nor the housepainter’s sense. Those people use their brush to ‘apply a coat’ by picking up a quantity of the medium, and letting it ‘run out’ onto the surface in various ways. For the printmaker, a quantity of the pigment mix is already in place on the wood waiting, and
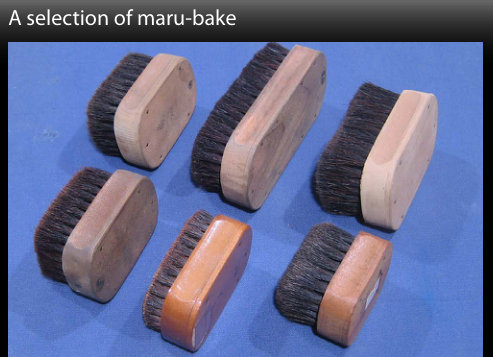
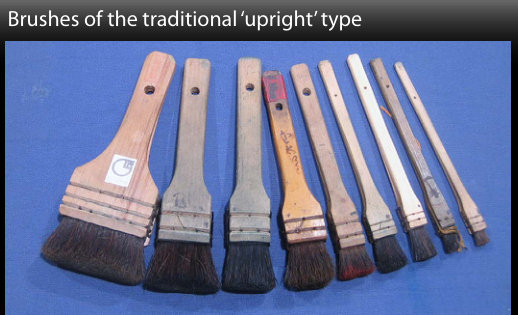
it is the function of the brush to blend the different materials together (pigments, paste, water), and spread them out smoothly across the entire surface of the wood. In order to properly perform this basic function of mixing and spreading, the printer’s brushes are quite stiff; they are made from fairly strong horse hair (usually a mane and tail mix) tied into very tight bundles and mounted in handles. The brushing motion is vigourous and energetic; a printer working in a poorly heated winter workshop here in Tokyo will not usually have any reason to complain about the lack of heating - he’ll be producing plenty all by himself, with his brushes and baren! Brushes come in a variety of sizes. Ideally you select the one that is the most suitable for the particular block in play: a brush too small simply won’t hold enough pigment, but one too large isn’t usually a problem. In fact, it is an advantage, as the extra pigment ‘reservoir’ helps maintain consistency from sheet to sheet in the amount being applied to the wood. A real problem for the beginner is the problem of keeping brushes clean. Even though a professional will wash out his brush after each session, it is difficult to clear all the pigment from the base of the hair, so he will not re-use a brush for a different colour group. Once a brush has been used for blue, you could never use it for yellow; you’ll never be able to avoid a greenish tinge. So if you need many different sizes, in many different colours, then what is the beginner to do? Well, you buy the largest ones that you can afford, and you get good at washing them! And honestly speaking, because you will probably not be making prints in batches of hundreds at a time, the pigment will not be driven all that deeply down into the brush, and you should be able to get most of it out each time. (Note though, black pigment just isn’t going to wash out, so mark those brushes as ‘Black only’.) Wash brushes by rubbing the hair under running water, trying not to let the wood section become soaked as you do so. Shake out as much of the water as you can, wipe the brush repeatedly over newspaper to get much of the rest out, then hang it up (out of direct sunlight) to dry thoroughly. Never leave it standing on the bristles.
About sharks ... I said that the hair selected for printmaker’s brushes has to be stiff; there is no way that we could use anything like a sable brush. But stiff hairs tend to leave streaks in the pigment/paste mix on the block, and these end up being visible in the finished print. The solution is to ‘tear’ the tips of the hairs create ‘split ends’ as it were - by rubbing the brush on a rough surface.
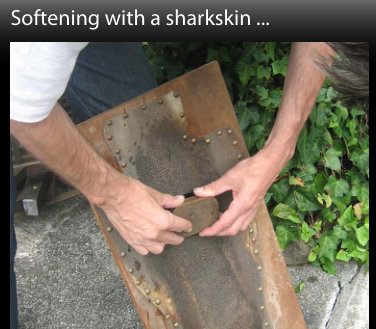
A piece of sharkskin dried and glued to a board has been the traditional tool for this for hundreds of years, and is extremely effective. If you have neither access to a piece of shark, nor the taste for it, it is possible to do the softening job with a rough sandpaper. The product known as ‘Dragon Skin’ (a hardened steel sandpaper substitute) is also very effective (but vicious - be careful!). Put on strong gloves, moisten the brush, and start rubbing. Watch carefully, as it can start to abrade very quickly; you don’t want to overly shorten the hairs, just frazzle the tips.
Miscellaneous brushespdf p.15
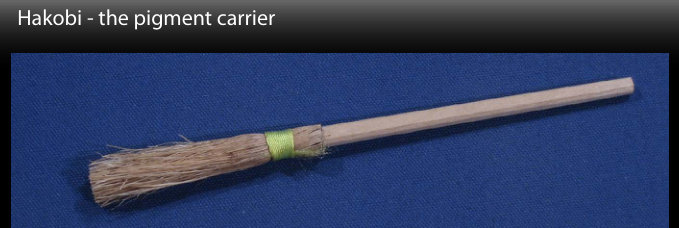
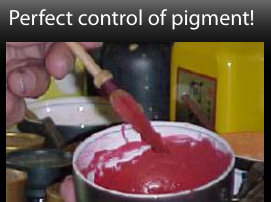
The ‘hakobi’ is such a nifty little tool! They are cheap to buy if you like, but they are also very easy to make yourself. They have two functions: to mix the pigment in the bowl, and to carry it over to the block, and they are very good at both of these. It’s important when doing a batch of prints to try and keep the colour from one sheet to the next as consistent as possible, and the hakobi allows a very fine-grained control over the amount that you ‘drop’ onto the block.

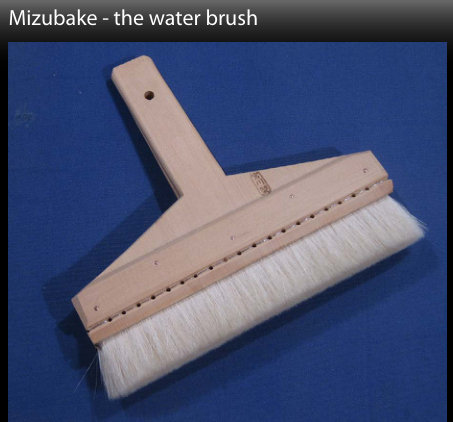
The ‘mizubake’ (pronounced ‘bah-kei’) is a tool that you are not likely to purchase for a ‘first print’, as a good one is quite expensive. You are ‘permitted’ to get yourself a wallpaper brush for this job at first. But start saving your pennies, because there is actually a world of difference. These brushes are made of a fine goat hair, hold an incredible amount of water, and allow it to be released at a very fine level of control, from the faintest mist of moisture, up to a full flood over each sheet. They are also sometimes used to ‘tone’ the paper, by preparing a faint pigment mix and brushing it over the sheets before starting the normal printing process.
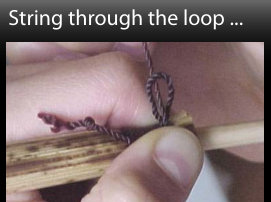
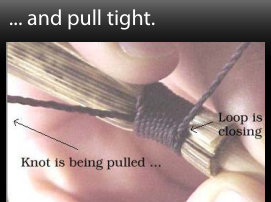
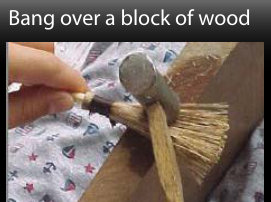
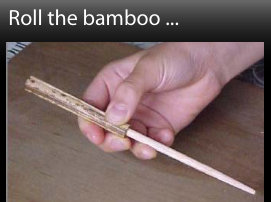
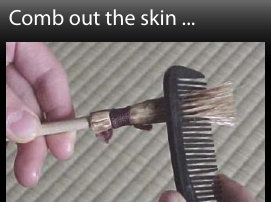
The Barenpdf p.16
This incredibly simple and incredibly complex object stands at the very heart of the printmaker’s art. We know absolutely nothing about how it evolved, or where it came from - and it bears no apparent resemblance to printmaking tools in other countries. It seems literally to have just ‘popped’ into being. Made from nothing but scraps of paper and shreds of bamboo skin, it is one of the most sophisticated tools available to craftsmen anywhere.
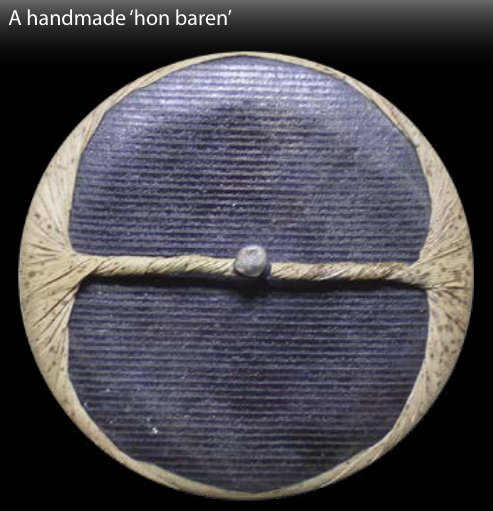
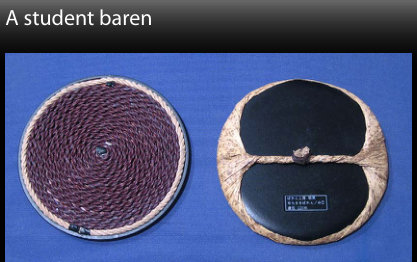
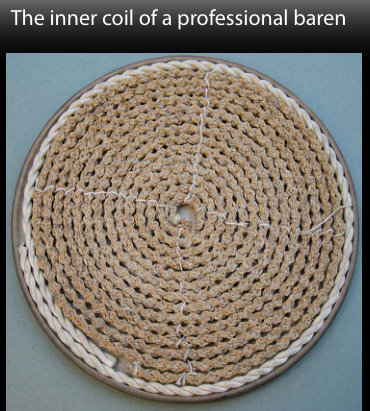
The traditional baren consists of three main components: shin : the coil of braided bamboo slivers whose angular projections are what actually press the pigment into the printing paper.
ategawa : the lacquered paper disc that cradles and supports the inner coil.
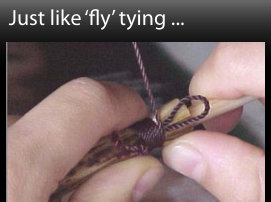
takenokawa : the replaceable sheath of bamboo skin that holds everything together.
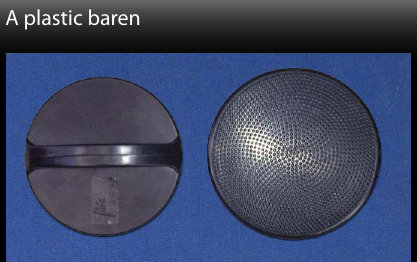
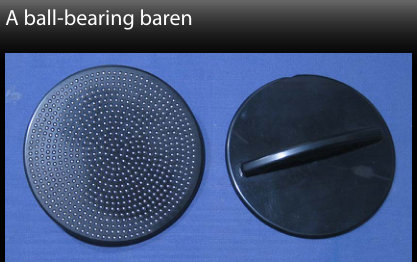
A professional printer doesn’t have just ‘a baren’. The inner coil of the tool can be made in many variations of strength and thickness, and the printer selects the most suitable baren for a particular job from his collection. A baren designed to print a keyblock, for example, will have a much more delicate coil than the powerful one needed to print a wide colour block. The beginner must usually make do with a single baren made in an ‘average’ strength. A ‘hon’ (real) baren of the type shown at the left will cost many hundreds of dollars, but there are many other alternatives available for the person just starting out on printmaking. The student barens shown here have a coil formed from wound cord, and a backing disc of plastic, and produce a satisfactory impression for most people. Plastic barens are even cheaper, and although they ‘feel funny’ to experienced printers such as myself, we have to recognize that their very low cost makes them useful for people making their first experiments with printmaking. They also have the very great advantage of not needing a bamboo skin covering, which certainly saves a lot of frustration for the beginner, as the job of tying the skin is difficult to learn. And for those people who don’t think they have the strength for woodblock printmaking, the barens made with a field of ball-bearings that roll across the back of the paper are available. They are commonly used with a thin oiled mylar backing sheet in place to protect the paper from damage. A good fat book could be written about these tools ... So many barens, so little time ....

Baren maintenancepdf p.17
Before you can use your new baren, the skin must be lightly lubricated with camellia oil. This oil has a couple of functions: - it of course helps the baren to slide smoothly over the surface of the paper, without tearing the fibres. - it deters absorption of the paper moisture up into the bamboo skin. The skin is always moistened before tying, to make it flexible and supple, but is then allowed to dry before use. If it starts to pick up moisture from the paper, it will become too soft to use ... Prepare some cloth about 15cm square thick enough to form a soft ‘pad’ on which the baren can rest during the printing process. This pad will gradually become fairly saturated with the oil, and you will not have to apply new oil very often. Use a type of cloth that doesn’t shed lint easily. Printers keep a little bottle of the oil at their bench, and use a cloth or swab to dab some on the baren when necessary. I have found it useful to keep the oil in a small plastic ‘squeeze bottle’ - this makes it very easy to apply just the right amount. Put a bit of oil on the skin, and then rub
the baren vigorously on its pad. The bottom surface will pick up a nice sheen. Note: using other types of oil is most definitely not recommended. Sewing machine oil (watch oil, etc.) leaves oil stains in the finished prints, and vegetable oils soon become rancid. Camellia oil does neither. And yes, the older printers here in Japan (the ones who still have hair), easily get a quick ‘recharge’ of the oil on their baren by wiping it across their head ... Another note: the baren should never be left sitting on its pad (except during the actual printing work). The skin becomes soggy from the oil and from not having a chance to air out. Whenever pausing in the work for more than even a few minutes, flip it over on its ‘back’ to expose the working surface to the air. At the end of the day always put it away on a shelf, exposed to the air. Don’t keep it shut up in a tight box.
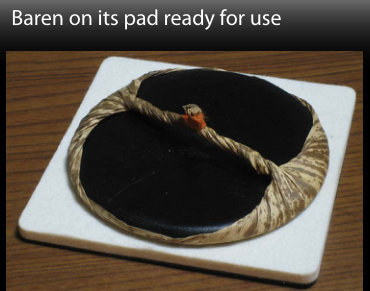
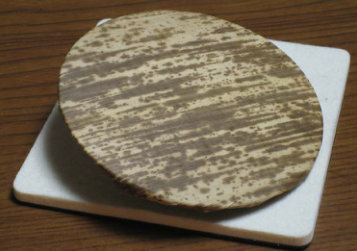
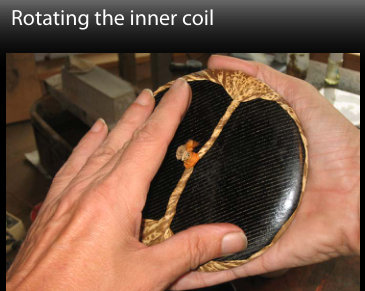
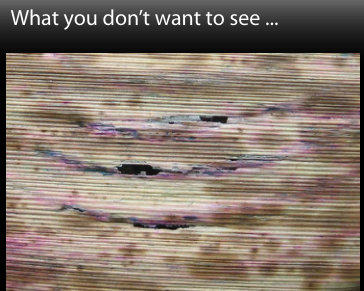
When using the baren, always remember that the inner section must be rotated occasionally inside the skin. This is to ensure that the bumps of the inner coil do not always press against the same places of the skin. If allowed to do so, they will wear through very quickly - but even before things get to that stage, you will notice a great decrease in the ‘power’ of the baren, as the bumps dig into the skin and lose their effectiveness.
The coil is rotated by holding the baren flat in one palm, and using three or four fingers of the other hand to press the ategawa disc and twist it in place. (A very slight moistening of the fingers sometimes helps). A new tightly tied baren skin can be extremely difficult to rotate; it begins to loosen up a little after some impressions have been taken. On heavy printing jobs, the coil is rotated after every impression; on light jobs much less frequently.
Baren recoveringpdf p.18
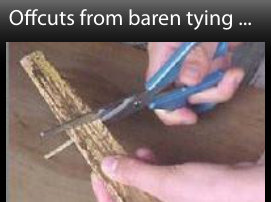
It’s a bit hard for me to believe now, but I used my first Japanese baren for literally years without changing the cover. Why so hard to believe? Well now with quite a few barens on hand, and sometimes changing them daily, the idea of using one for such a long time is simply inconceivable. But changing the cover is admittedly a difficult job. In one sense it’s quite straightforward - just moisten a piece of bamboo, wrap it around the baren, and tie it somehow on top. That method works well ... if you are not so demanding about how you intend to use the tool, and if the printing you are doing does not involve too much physical pressure. But if you need good control over the tool, and certainly if you wish to be able to print deep and smooth colour, the baren must be tied correctly - and correctly in this case means tightly! At present, I have no facility for having students or apprentices in my workshop, and whether or not I ever will have I can’t say. But I already know what the first ‘rule’ of the workshop will be: every printer in training will tie a practice baren skin every morning before being allowed to take his place at the breakfast table! No practice ... no food!

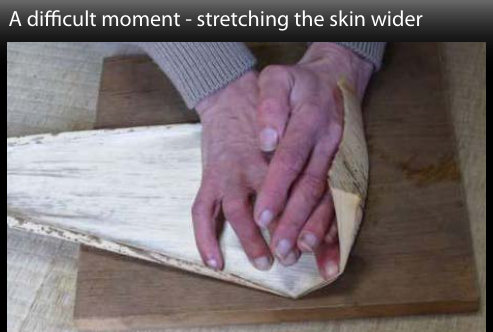
This is one of the more awkward parts of the process; the skin has to be stretched in width ‘across the grain’, and it requires quite some skill to do this without having the skin split.
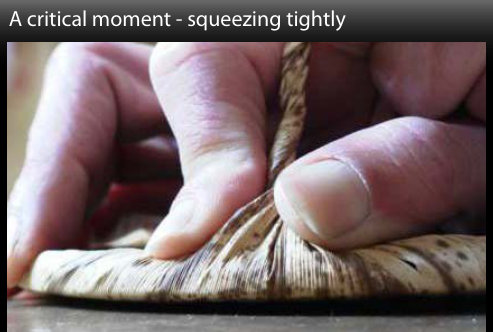
At a number of spots during the procedure, you will be convinced that it is simply impossible to get through with just two hands ...
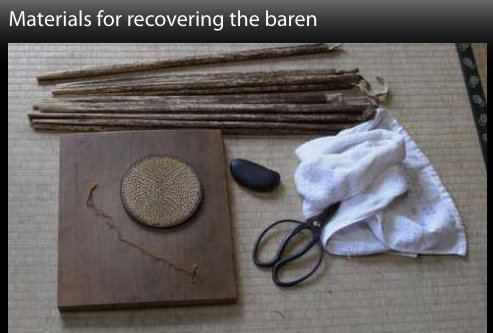
It’s a very low-tech process. The professional printer here in Japan recovers his baren while sitting in place at his bench, and all his supplies are kept within easy reach: a stock of replacement skins, scissors, a hard board, and some kind of tool for rubbing the skin to crush the fibre ridges (in this example, a smooth black river stone.)
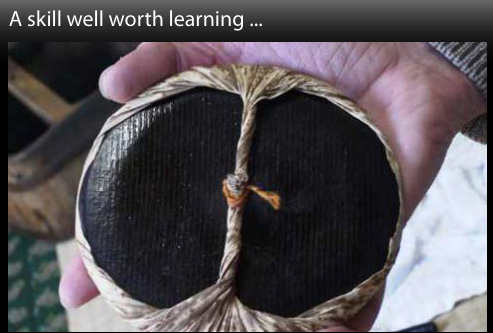
... but you will, after enough practice! And what a difference a well-tied baren makes! It will sing happily in your hand, and will be eager to do most of your work for you!
Materials
Woodblock printmaking is a very old technology, and one that is found in pretty much every society around the world. There is no clear evidence that it arose in one place and then subsequently spread around the globe; it is such a basic technique that any society that gets to a certain level of technical sophistication would develop it as a matter of course. As a result of this, woodblock printmaking (whether for artistic or purely reproductive purposes) now comes in a great many ‘flavours’. As one might expect, the techniques common in the west differ quite a lot from those in the east, but even within regions - between Japan and China to take just one example - the process is very different. So although the fundamental concepts - cut shapes in wood, apply a colorant, place paper on top, apply pressure - are the same here in Japan as anywhere, there are a number of characteristics that make Japanese printmaking unique - and superior! - in comparison with other types. Far and away the most fundamental of these is the use of washi - that magnificent material that deservedly gets its own vocabulary entry. Here in Japan the word kami refers to ‘that flimsy white stuff that the rest of the world uses for writing on,’ while the term washi (literally - ‘Japanese kami’) is reserved for the material formed on a bamboo screen after being dipped from a vat of beaten plant fibres, commonly mulberry, and which is a world all to itself. In this section of our book, we’ll take a quick look at this paper, and the other materials that will go into the making of our print:
- Wood
- Paper
- Pigments
- Pigment preparation
- Miscellaneous supplies
Woodpdf p.20
The wood used for a woodblock print of the type we are considering has to strike the right balance between a few (sometimes competing) factors:
- » it must absorb water, but not to the extent that it becomes soggy.
- » it must have enough physical strength to stand up under the vigorous rubbing process.
- » it must be hard enough (have the structural strength) to allow clean cutting, without chipping or crumbling.
- » it must not be so hard that it is exhausting to carve, or to the extent that it will not absorb water properly. There is of course no single type of wood that will be the best for every printmaker. What kind of wood you will use will depend completely on the type of design you create. If you are sensible, your first design will be similar to the sample in this project - something without many fine lines, and without too many very broad colour masses. For work like this, the softwood plywood known as shina will be perfect. It will carve easily, you will not break your knife, and it will print smoothly. If though, you intend to make a print similar to an old ukiyo-e design with delicate tracery, shina will not suffice. You need something that will hold detail both while you are carving and later under the pressure of printing. The wood of choice for this is cherry (specifically Japanese yamazakura - the mountain cherry), which has an excellent balance between those competing requirements of hardness and absorption. Making your selection from one of those two options will put the fewest barriers in your path. If you can’t get the wood of choice, then it is of course possible to use anything at hand for your first experiments. The guy writing this manual knew very little about suitable woods back at the beginning, and used a piece of heavy maple plank for one of his first prints. Maple ... cherry ... they’re both good hard woods; what’s the problem ... Well, he got through it, but what a horrendous mess: broken knife blades, ragged curves, chipped lines, sore shoulders ... you name it. Experimentation has its place ... but so does experience!
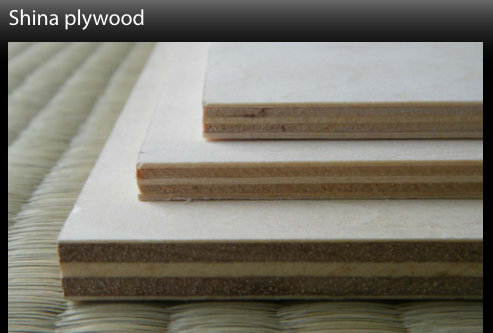
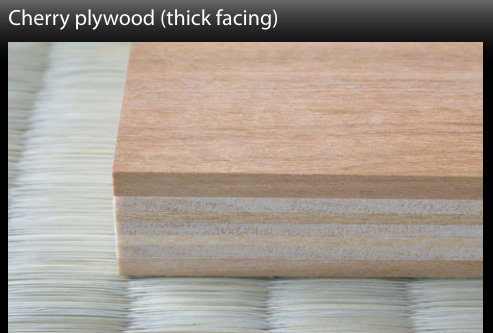
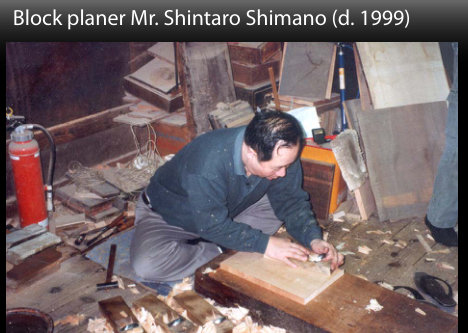
Back in the old days - and I mean the old days ... well over a century ago - there were dozens of shops in Tokyo supplying blank blocks for woodblock printmaking. Dozens of shops, supplying hundreds of carvers, who in turn kept thousands of printers busy. Those were the days when most commercial printing was still being done on wood, and even the full text of long books was all carved by hand - character by character. Because it was such a fundamental part of the commerce of the day, very knowledgeable and expert men controlled every aspect of the process: from hiking the mountains to find trees which they knew would make suitable planks, through all the subsequent lumbering, transport, re-sawing, drying, selection and dressing stages, right up to the carver’s workbench. But when the printing presses moved in, back in the Meiji era, and killed off the hand work, that system collapsed and all the accumulated knowledge was lost. When I open a package of new cherry blocks from the supplier these days, I do so with trepidation, rather than the pleasure that used to accompany the occasion.

Paperpdf p.21
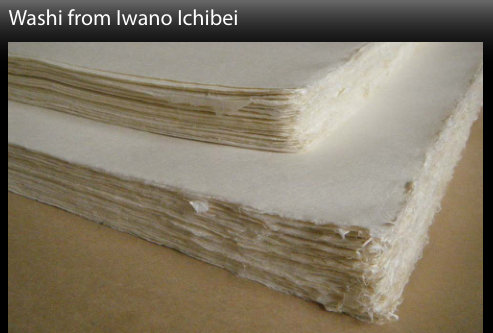
Paper. On every other aspect of this project, I will be flexible. You can use a cheap cutter knife. OK. You may choose old barn siding for your woodblock. Go ahead. You can steal watercolour pigments from your kindergarten daughter’s paint set. Sure, see if I care. But you WILL NOT COMPROMISE when it comes to the paper. On small things there can be negotiation and compromise ... how much of our energy should come from nuclear? - what should we do about climate change? - how can we balance our national budget? ... Details, details ... irrelevant details ... But on some things there can be NO negotiation. When it comes to paper, you will do what I say. I can tell you straight up - if you do not use a good Japanese paper, you are pretty much wasting your time. I am not joking about this; using a Japanese ‘rocked’ paper will make a tremendous difference in the result. I slightly touched on why this is so, back in the introduction to this book, where I talked about the pigments being pressed ‘down into’ the paper, rather than remaining up ‘on top’. And this is perhaps the best place in this book to let you in on a little secret - most of the beauty in a Japanese woodblock print (and I use that word ‘most’ with no exaggeration) comes from a beauty inherent in the materials and procedure. I would go as far as to make the following challenge: we could ask an experienced Japanese printer to sit at his bench while we tie a blindfold around his eyes, and have him then - working by touch - mix up some random pigments from his jars, brush them in random fashion over pieces of wood we placed in front of him, and rub them into place on ... good Japanese washi. The result would presumably lack a coherent artistic ‘vision’, but it would be a beautiful print! The ‘pigment - washi - baren pressure’ combination just guarantees it! I don’t need to say much more at this point. As you will see when we get to the part of this book that covers actually how to print, I will ask you to use any kind of junk paper you have have on hand for

practicing the physical movements of the printing process and for rough proofing. It would be criminal for you to use good Japanese paper for that kind of training. But for making your print, you will use the real thing. There are many varieties of washi suitable for woodblock printmaking, and these days they are not at all difficult to obtain. I’ll make a few recommendations in the sidebar on the right, and will suggest some places to get them in the ‘Suppliers’ section at the back of the book. (And relax, it won’t be all that expensive!)
Recommendations When you get to the point of selecting your paper, either in a shop or from an online supplier - you are going to be faced with a bewildering array of paper types. And it doesn’t help that the product names in Japanese soon just blur together into an incomprehensible jumble. So here are a few guideposts - a short list of papers that you can safely select for your trials. Anything on this list should be OK for you to use for the kind of printmaking we are covering in this book.
Hosho is the generic name for a class of high quality paper; you will run across the terms Kizuki Hosho and Echizen Hosho. All my own prints are made on this (expensive) paper.
Masa, or Iyo-masa, is the next most common paper for traditional work here in Japan - the ‘journeyman’ among these papers.
Torinoko, also Shin Torinoko, is probably the paper most used by hobby printmakers here. Many types are available, in a range from whites to creams.
Nishi-no-uchi, Hosokawa, and Hodomura are three similar mulberry papers, with a pleasing old-fashioned toned appearance.
Specialty papers: Minogami, also usu-mino, is a thin and strong paper used for drawing the design and pasting onto wood for carving.
Gampi is also used for that job, and is extremely thin and strong. It is also possible these days to purchase ready-made laminated paper for preparing the hanshita, the sheet pasted onto the block which carries the image for carving. Note: Please ensure that the printing paper you purchase is pre-sized (for the papers in this list, this will usually be the case). Doing your own sizing is a process well beyond the scope of a beginner’s book like this.
Pigmentspdf p.22
The section on pigments in most books on Japanese printmaking usually includes a long list of exotic-sounding colour names, leaving the reader thinking that they are going to be asked to go out and find some ‘eye of newt’ or whatever. It doesn’t have to be that complicated. Let’s look at it from the other way around - let’s describe what you need in that little bowl on your printing table (photo below), and then explain how to get it. What you need: some coloured ‘stuff’, blended with water, at the general consistency of a typical sauce you would pour onto your dinner. Think a typical white sauce. How to get it - method #1 (for your initial experiments): start with typical tube watercolours. Squirt a spoonfull or so into the bowl (from a single tube, or a blend of colours, as you wish). Dip your hakobi mixing brush into some water, and swish around until you have a smooth sauce. Don’t make it too runny. That’s it. Your pigment preparation is now finished. Proceed to the printing stage. You don’t need anything else in that bowl, no binders, no glues, no nothing. Method #2 (for after you’ve decided you kind of like this printmaking thing, and you’re willing to invest a bit more time and trouble to get better results): Go to an art supply shop (or online supplier) and pick up a small selection of powdered artist’s pigment, in a few basic colours. Prepare them in the method outlined on the next page. Then simply proceed as with Method #1 above, but using those instead of the tube stuff. And again, you won’t need anything else in the bowl, just the smooth ‘saucy’ blend. All the ‘fixing’ and ‘binding’ will happen automatically at the printing stage. When it comes time to print, we will be applying three things to the surface of the wood: water, our pigment mix, and some paste. It is theoretically possible to mix these things all together in one bowl, and then put that substance onto the block, but this doesn’t work in practice, as the balance between the components changes as we work through our stack of prints (the dry block becomes more wet, etc.). We need the flexibility to control the three components individually. The level of colour saturation in a woodblock print is controlled by:
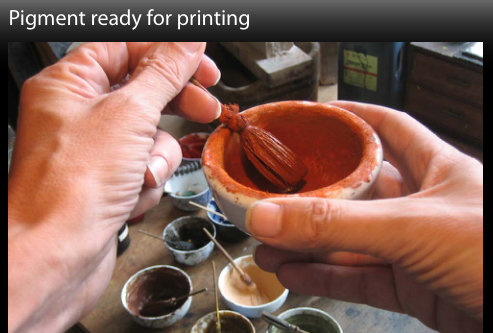
- » the density (‘thickness’) of the pigment mix in the bowl
- » how much of that mix is applied to the wood surface
- » (optionally) multiple printings If the mix in the bowl is too weak though, there is no way to get good saturation in the print. So the usual procedure is to prepare quite a good ‘juicy’ mix in the bowl, and thin it as required during application. Don’t let your ‘sauce’ get too runny!
You’re ready to start printing, and one of the blocks is to be ‘green’. Using a clean small china bowl with no pattern inside (you can get these very cheaply from any local Chinese ‘import’ shop), spoon in from your base jars, the ingredients that will create the particular tone you want. Most greens will start with a blend of yellow and blue obviously, but touches of black and red may also be appropriate. Mix the blend in the bowl using one of the hakobi brushes that you made earlier. But suppose you want a very faint pale green on the print? The paste coming from your pigment jars is quite a deep colour, no matter how you blend it. And here we reach yet another ‘important point’ alert - to create lighter shades of any particular colour, no ‘white’ pigment is used. ‘Lightening’ is done by ‘mixing’ the normal saturated pigment mix with the ‘white’ of the paper. Do you want to print pink? No problem; mix a nice deep red in your bowl; then at printing time, transfer only the tiniest tabs of it over to the block, to be mixed with the water and paste (which are increased in proportion to make up for the lack of ‘substance’ in the brush otherwise). The result will be a perfect pink. A delicate blue sky will be created the same way - from a rich blue in the bowl, with only the appropriate amount going to the block. Why no white pigment? Because of the opacity that it adds. Colour pigment with white mixed into it causes a couple of problems:
- » it interferes with the sharp clarity of the lines of the key block
- » the opaque colour ‘kills’ the wonderful tone of the underlying washi Some of this is personal taste of course, and printers in the Kyoto area of Japan have traditionally used opaque pigments to a far greater extent than those in Tokyo. I live in Tokyo. And this is my book. So there you have it no white in the bowl!
Pigment preparationpdf p.23
Pigment can be ground either in a mortar, or on a slab (glass plate, countertop, hard wood surface, etc.) Start with a spoonful of the pigment, sprinkle it with a bit of water, and grind out the lumps. The longer you keep at it, and the finer you grind, the cleaner and smoother your printed colours will be. Some pigments are initially resistant to blending with water; adding splashes of alcohol (from your medicine cabinet, or your liquor cabinet, as your taste determines) will allow them to be mixed.
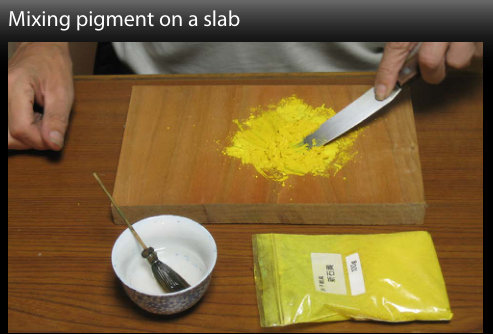
Add more powder and water bit by bit as you work. The idea is to end up with a smooth, pasty mixture, one that won’t ‘run’ off the edges of your work surface. Keep it all wet, so that no dust is released as you work. If you’re nervous about this, use a mask, and ventilate well. In traditional workshops the pasty pigment mix is then stored in glass jars, with a layer of water on top of it. (If the jar is not disturbed, the layers remain separate.) Each and every day, the water on top is gently decanted and
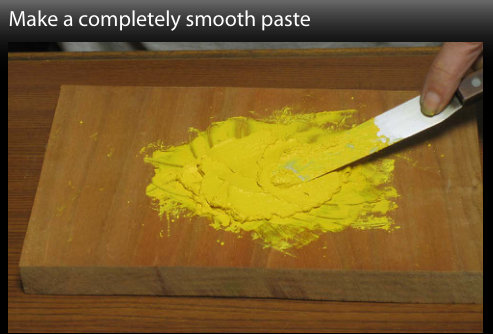
replaced with a fresh supply, thus keeping the liquid from becoming moldy. My own method is somewhat more ‘low maintenance’ - I have no apprentices here to do a job like that! I scoop the paste into a jar, mix in some alcohol, close the lid, and store the jar in a cool place. It doesn’t last ‘forever’, but if you make it in relatively small batches, it should be just fine.
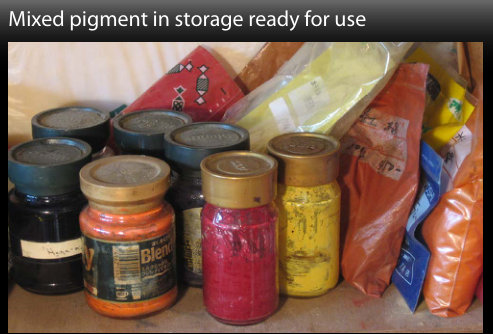
Must you go through this fundamental mixing process with each and every one of the various colours and tones you are going to use in your prints? Do you need a shelf full of hundreds of these jars of prepared pigment mix? No. And this brings us to another of those important points that need to be emphasized - in the traditional Japanese printmaking technique, only a few ‘base’ colours are prepared in advance, and the actual colours that will be used in any particular print are created at the printer’s bench, at the point of printing.
Traditional printers here will rarely use a store-bought green pigment, or a brown or a purple, etc. The key point is that the Japanese woodblock printer (and this will include you, soon!) does not choose his colours, he creates them. Think back to the indescribable multitude of subtle colour tones that we see in the old ukiyo-e prints - they were the work of the printers, not the designers, and they were created by those craftsmen right there at the bench. My own set of base colours is completely typical, and from these seven little jars I have produced every single colour tone in every single print I have produced in the past couple of decades:
- » ai : indigo blue
- » kin-bero : prussian blue
- » shu : vermillion
- » hon-yoko : a red similar to carmine
- » ben-gara : a ‘rusty’ red
- » ki-o : a traditional yellow
- » sumi : carbon black
Other small suppliespdf p.24
Paste All the other materials that we will need fall pretty much into the ‘household items’ category, so I’ll just describe them as they come up during the explanation of the process below. But one does need a bit of explanation - the paste. This is one of the most confusing and least-understood elements of the traditional Japanese process. On the face of it, there is nothing confusing - the paste is what ‘sticks’ the pigment to the paper, no? Well, no. It’s quite possible to take an impression with nothing but pigment (mixed with only water, no binder at all) without using any paste. It hardly seems possible, but the result is a completely ‘normal’ woodblock print. The colour becomes embedded among the paper fibres, and neither ‘dusts’ off, nor can be rubbed off. So if the paste is not needed as a binder, then why do we use it? It helps with a couple of things: when brushing out the mix over the surface of the block, using paste clearly helps make a smoother impression. Without it, the colour tends to become blotchy, and indeed, when looking for a mottled impression (goma-zuri, or ‘sesame-seed printing’) one part of the recipe is to reduce (or omit) the paste and use a watery pigment mix. Another thing that paste does help with (although this is minor) is that for certain types of blocks - notably those with small surface area - the paste does help the paper stay in position during the rubbing. It’s certainly not necessary to make your own paste from scratch. I use hand-made paste (prepared for me by a lady friend!) for ukiyo-e reproductions, where I really need the finest and smooth impressions, but for modern work, where the impression is frequently ‘textured’ anyway, commercial paste is fine. The kind you want to find is that fairly translucent type that comes in plastic squeeze tubes for household use. It’s too thick to use straight from the tube, but can easily be watered down. Just exactly how thick/thin to prepare the paste, and how much to use on the block is another of those things that will only become clear with experience. When we start printing later, I’ll ‘tell you what to do’ at first, and you can take it from there depending on the results you get.
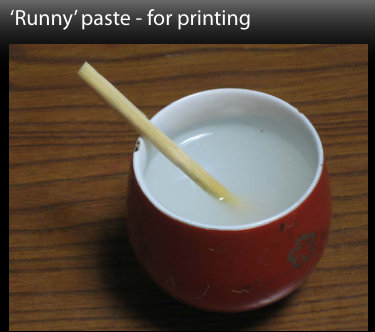
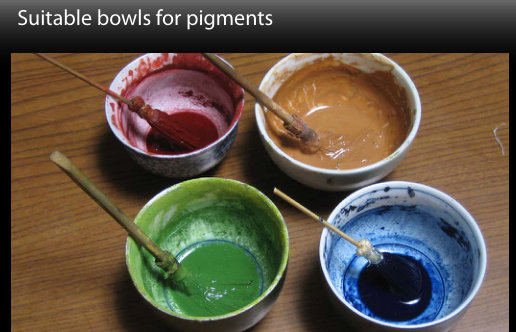
There’s no end to the list of ‘little things’ you need for printmaking - especially when you are printing, but most of them are likely to be already at hand in your home:
- » bowl for water
- » ‘non-slip’ sheet for use under the block while printing
- » rags for wiping and cleaning
- » ‘junk’ paper for colour testing
- » strong plastic bags for covering the printing paper One thing that I find to be useful is one of those small electric ‘cup warmers’. And it’s not just for my mug of tea - I use it under the bowl of pigment during winter; you have no idea how cold a Japanese house can be in February!
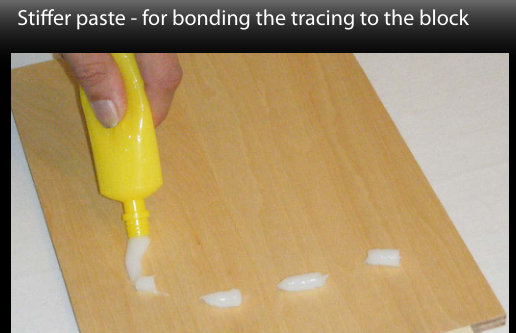
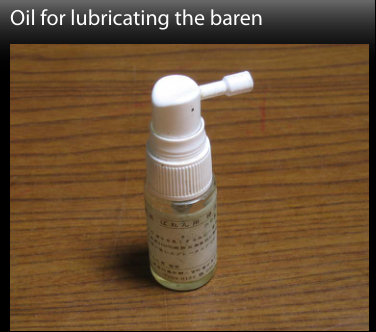
The Workplace
Traditional carvers and printers in Japan work in very small spaces, many of them at home, and in very small homes to boot. Professional printers have worked out a particular style of workbench that allows them to work at top efficiency while making batches of thousands of prints at a time, but I rather suspect that such a thing will not be necessary for you just yet. For both carving and printing, it would be counterproductive to ask you to sit on the floor at a low bench; a normal tabletop will do. Nor will you need to set aside a special place for your printmaking activities. Everything will clear away in a few minutes. For the first fifteen years that I was a professional printmaker - making my living at this - I had no workroom. For a time we were a family of six living in a very small Japanese apartment; I used foldable carving and printing benches that I had made for myself, and each evening when the day’s work was over, I packed them away, swept any wood chips off the floor, and laid our bedding out in the same space. Unless you too live in a small house in Japan, this won’t be necessary, but my point should be clear - making your first woodblock print is a job that can be done ‘part time’ on your kitchen table. On the next couple of pages we’ll look at the specifics of how to organize the workspaces for carving and printing.
The Carver’s Workspacepdf p.26
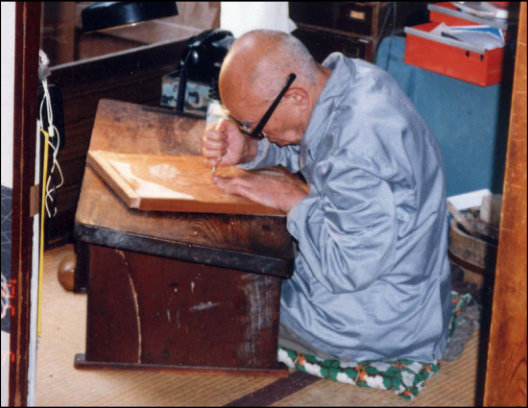
The printing space which we will look at on the next spread has an endless number of things which I can talk about and explain - things which must be explained, and I’ll have trouble fitting it all on one spread. The carving space though, has not much to explain at all. Put the piece of wood on a table, and start cutting. And as the first-time printmaker is unlikely to be building a customized carving bench with a great slab top and strong bench ‘dogs’ to hold the wood securely in position, like the one you see the late Mr. Susumu Ito using in this photo, there isn’t going to be a great deal to talk about.

But there are indeed a few things worth mentioning. One of course is to emphasize that you provide yourself with adequate light to carve by. The other is that you arrange the work environment in a way that suits you best. As you can see from this image, and from the video of my own carving workspace on a later page, the traditional carver’s bench has a slanted top. This puts the block at an angle that exactly matches the carver’s forearm, and greatly reduces the stress on the wrist joint particularly. Back in the old days nobody gave any thought at all to such things as repetitive strain injury, but the tools and methods were grounded in common sense. To a westerner, Ito san’s overall posture here is hardly one that would be described with the words ‘common sense’ - have his legs been amputated? - but to someone of his generation who grew up sitting on the floor, it is completely comfortable. Ito-san was 79 at the time I took this photo, and continued carving right up until a few days before his death in his 82nd year, having worked as a wood-cutter since his teen years. He must have been doing something right!
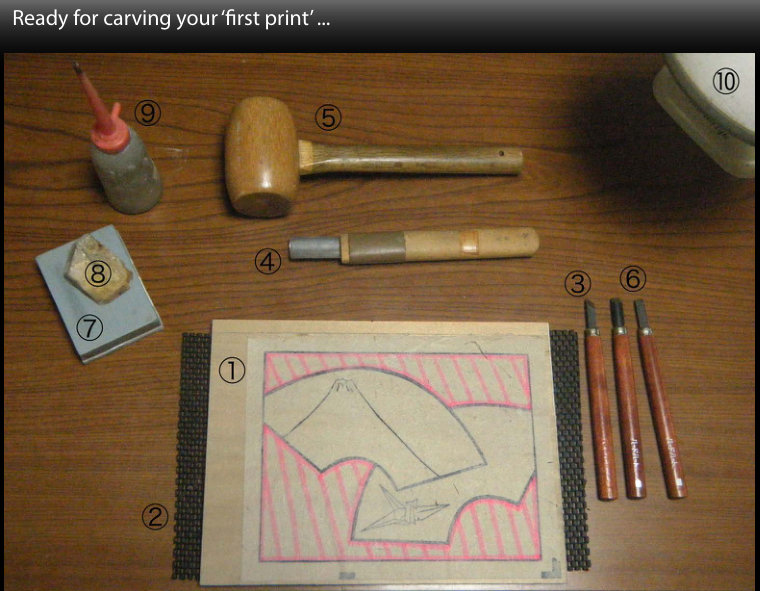
1. Block waiting to be carved (this is one of the blocks for our demonstration print) 2. Non-skid material underneath block 3. Hangi-toh cutting knife 4. Maru-nomi (‘u-gouge’) for clearing waste wood 5. Wooden mallet 6. Ai-suki chisels for final clearing 7. Simple sharpening stone (two-sided : medium and fine) 8. Nagura stone (for making ‘mud’ on the sharpening stones) 9. Water bottle (for moistening sharpening stones) 10. Desk lamp In ‘real life’ I don’t keep all these tools out on the desktop all at the same time. They stay in the drawers out of the way, and come out as needed. (But don’t take that as permission to ignore your sharpening!)
The Printer’s Workspacepdf p.27
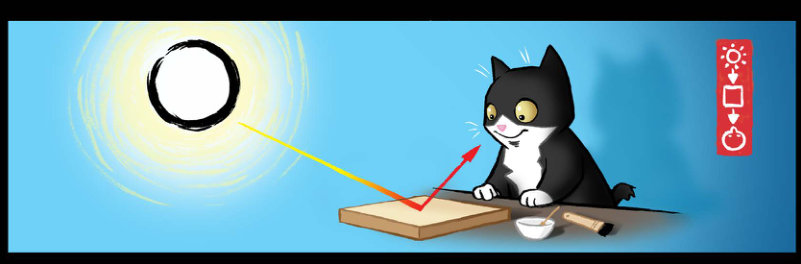
I’ve mentioned earlier how woodblock printmaking is undemanding in terms of space requirements, but that was just the ‘good news’; the other side of the equation is that when it comes time for the printing, you are really going to have to be serious about organizing your workspace, small in scale though it may be. Why should this make a difference? It might perhaps be best to make a comparison with cooking. You’ve got the frypan heated up, approaching the correct temperature. You’re chopping some of the ingredients ready to toss in ... Now, how organized are you? Can you reach the pepper without fumbling in the drawers trying to find it? No? Where is it!? Turn down the pan while you look ... Got it! Turn up the heat again ... Now, has that marinade been prepared in advance? I think you see what I’m trying to describe. To pull a good impression of any particular colour from one of your blocks, the wood has to be at the proper level of moisture retention; the dampness in the paper has to be ‘just right’, and the process of getting the pigment smoothly spread on the block, placing the paper, pulling the impression, etc. all have to proceed smoothly and without interruption. An experienced printer can do the whole thing with his eyes closed and in his sleep, because the movements have become completely automatic. And the only way to get ‘automatic’, is to be consistent, and the only way to be consistent, is to be organized! (Don’t be disheartened by my description; I’ll ‘step you through’ all this bit by bit in the next section.) Having the workspace face a window will help keep things illuminated, but you certainly don’t want sunshine streaming over the workspace. What you do need is an arrangement by which a light source (window light, or a lamp) shines onto the block at the proper angle to allow you to see the moisture on the block surface. Without this, you will never be able to control the water properly, and the entire process will be an exercise in frustration. Set up good light before you start!

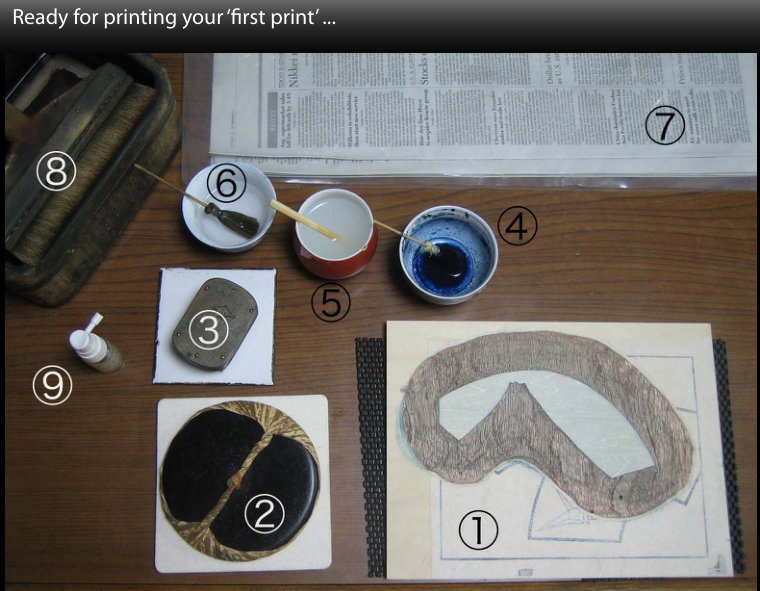
1. Block (sitting on ‘non-slip’ material) 2. Baren (on pad) 3. Brush (on tile) 4. Pigment mix (with ‘hakobi‘ applicator) 5. Paste (with stick applicator) 6. Water (with ‘hakobi‘ applicator) - for adjusting moisture in the colour mix on the block as necessary 7. Paper waiting to be printed (face down inside damping sheets, and tucked under plastic) (Stack to receive printed sheets is out of view, just off to the right) 8. Water bucket (with ‘mizubake‘ brush) - for moistening the damping sheets and block as necessary 9. Camellia oil for lubricating baren (small spray applicator) Note: I prepared this layout as though I myself was going to sit down and print ... but as I am left-handed, I ended up arranging everything - brush, baren, etc. - on the left side of the block. Please watch the videos later in the book, and then make your own arrangement to suit your own handedness!
The Image
In this section, we’ll look at what sort of image you might select for your ‘first print’. I have no intention of trying to direct your ‘artistry’, and you will get no hints from me on such things as ‘composition’ or any of the other factors that go into making the ‘art’ itself. But there are a number of things to consider once you have decided to make your creation in the form of a woodblock print, as the medium has its own characteristics and limitations. A few decades back, a group of craftsmen here in Tokyo made a reproduction of a small Chagall watercolour; they used more than 200 blocks to re-create every small nuance of gradated colour, and were very proud that their finished product could not be distinguished from the original when placed side by side. Well, congratulations to them, but when making one’s ‘first print’, where the intention is mostly to familiarize yourself with the concept, it might be better to stick a bit closer to the ‘basics’. By basics I mean that the print we are going to work with in this little manual will be of the ‘outline’ type, with a key-block and separate colour blocks. This is the most fundamental type of Japanese print, and knowledge of how such prints are made is essential to any understanding of the genre. Once you have worked through a print like this, you should have no problem adapting the method to whatever individual style of working you choose to explore. It will - I hope - also provide you with a better understanding of what you are seeing when you look at traditional Japanese prints. I sometimes do printing demonstrations, where the viewers see me progress from a blank sheet of paper to a finished - and sometimes very complex - multicolour print, all in the space of a few minutes, and without moving from my cushion. They are always astonished at the ‘disconnect’ between the complexity and sophistication of the finished product and the apparent simplicity of the tools, materials, and process that they just watched. So pay attention, work carefully through the rest of this book with me, and soon you too, will be amazing everybody!
Design considerationspdf p.29
The sample image provided here - which you will see in the subsequent process photos - has been created with a few things in mind:
- » to introduce you to how the traditional ‘key block’ system works.
- » to provide you with a pattern to use, if you would like to follow these photographs and steps exactly for your first print.
- » to illustrate what type of image is suitable for minimizing difficulties for the novice. Because the first time printmaker has no experience, it is difficult for them to know what is ‘Sure, no problem!’, what is ‘Yeah, you should be able to handle that.’, and what is ‘Don’t even think of trying that!’ The image I have prepared falls into the middle of those three categories. If you would rather use a design of your own, you are of course completely free to do so. It wouldn’t be a bad idea though, to try and follow the same general kind of image that I prepared; I don’t mean the ‘fan’ concept, but such things as line widths, image dimensions, and overall level of complexity. If you push too far beyond these suggestions - making the lines much thinner, including a lot more detail, or making the print larger - you will greatly increase the difficulty of the project ... A tracing of this sample image, ready to be printed out and pasted onto the block for carving, has been included in the download package of this eBook. (If you wish, you can ignore the image portion, and just use the borders and registration marks, drawing your own design into it, either manually or with a computer.)
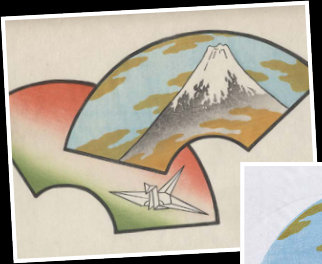
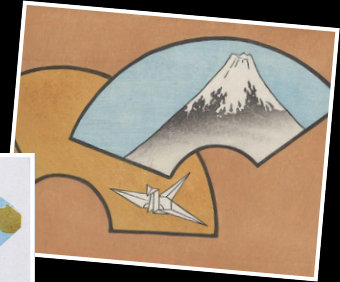
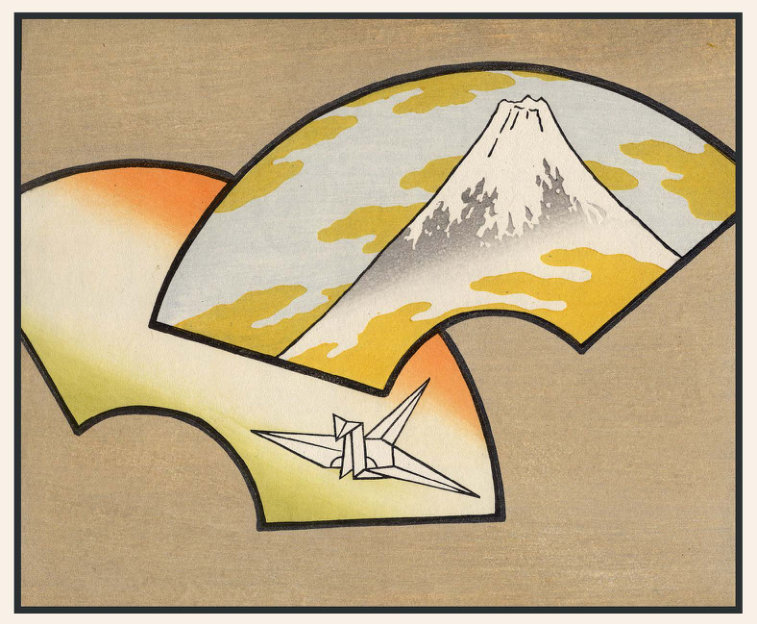
When I first carved this set of blocks, I had a fairly clear idea in mind of what I wanted, and the print that I made turned out to match that fairly closely. But any given set of blocks can be printed in an infinite number of ways:
- » colour tones can be lightened or darkened
- » colours can be switched to something completely different
- » gradations can be applied
- » printing ‘variations’ can be used: textured printing such as ‘goma-zuri’ (sesame seed printing, with a mottled effect) or ‘baren-suji’ (showing the marks from rubbing with the baren)
- » blocks can be omitted, or new ones added There is of course no end to it. The images on the left show some simple variations on this basic image that were printed with the same set of blocks.
Preparing the ‘hanshita’ paperpdf p.30
In the old days, the designer usually provided what we would now call a ‘rough’ to the publisher. This was cleaned up, arranged as necessary, and traced out in careful detail by specialists. They did this onto a very thin, and very strong, Japanese paper. This was sent to the carver, who would

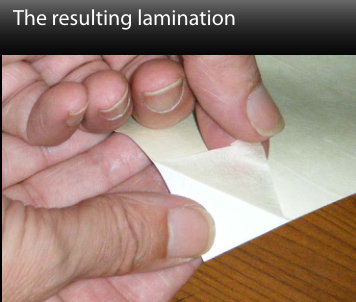
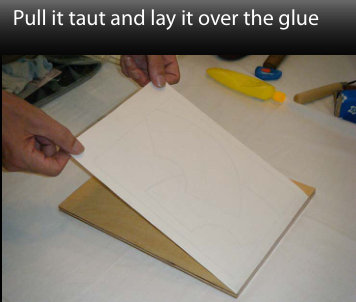
spread paste on a fresh blank block, and glue it in place - face down. Because the paper was so thin, the lines of the drawing were clearly visible for cutting. But also because it was so thin, it was very difficult to handle while pasting, and we are told that only the most experienced men were allowed to do that job. What is the best way for us to adapt this procedure, keeping the benefits (the sharp and clearly visible lines, the zero resistance to the knife), but eliminating the problems (the difficulty of drawing on and handling such thin paper)? The solution that I have been using for many years now is to use a lamination: a delicate thin paper similar to that used in the old days, fastened to a base sheet for support. This system provides many benefits:
- » the lamination is easy to handle, both at the drawing stage, and when it comes time to paste it down on the block
- » it will go through your computer printer (either inkjet or laser), so you can optionally prepare your master in Photoshop, Illustrator, etc.
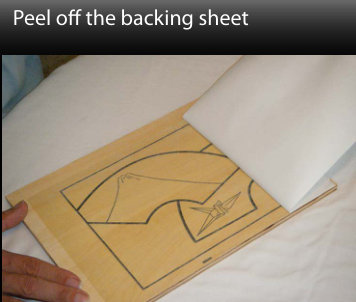
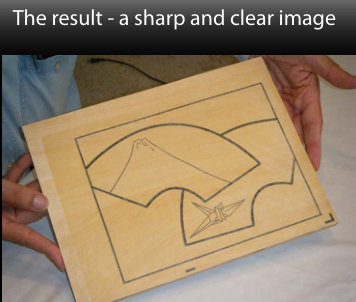
- » after pasting onto the wood and peeling off the backing sheet, the clarity is stunning.
- » Laminated paper of this type can now be purchased ready made (see the supplier list), but it is also easy to make yourself.
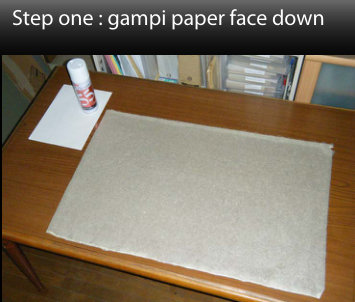
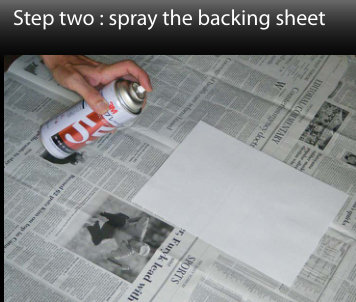
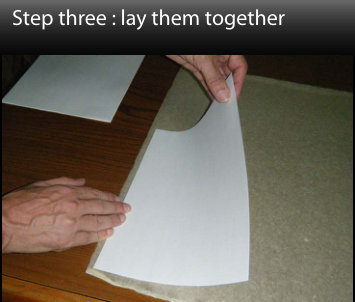
It is well worth taking the extra time and ‘trouble’ to make some of this paper; once you start carving, and see how beautifully sharp and clear the image on the wood is, you will certainly thank yourself! A couple of points about the process:
- » If you are not using traditional gampi paper, but some type of thin paper that you have found locally, be sure to test it first to make sure it doesn’t buckle when wet. I tried using a draftsman’s ‘tracing paper’ once, but was not able to paste it down flat to the block.
- » Don’t go overboard with the spray glue. Use a ‘low tack’ (removable) type, and keep it on the light side. If it is too strong, the backing sheet won’t peel off easily after the lamination is pasted onto the blocks.
Pasting the image onto the blockpdf p.31
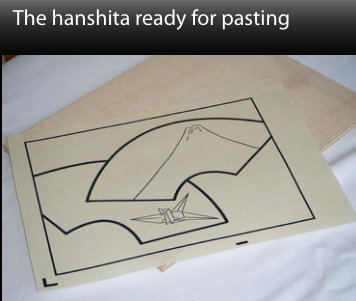
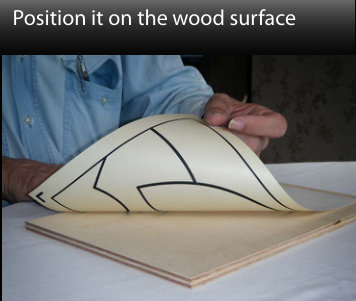
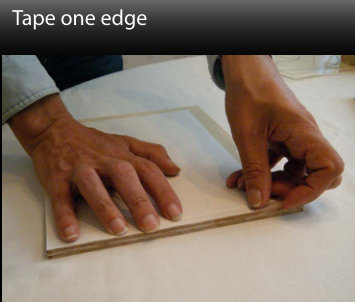
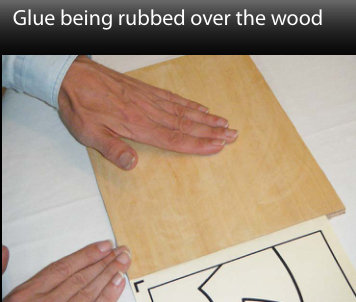
You want to get the hanshita pasted down as smoothly as possible, and the procedure illustrated here - using the paper prepared on the previous page - will let you do that. It is pretty self-explanatory, but there are a few things to note:
- » You want the registration marks to be near one edge of the block, as visible in the photos, but don’t put them right at the
edge; it’s difficult to make adjustments later if they are hanging right near the edge of the wood.
- » Before taping the sheet in place ready for gluing, ensure that any defects in the wood will fall in open spaces on the de-
sign. The plywood illustrated here is pretty smooth and clean, but when I use hard cherry wood, I have to keep any knots, etc. away from the lines of the design.
- » When you are rubbing the paste over the wood surface watch carefully not to miss any spots, as the hanshita would thus
be loose in those places (if the image contains many very fine lines, I use a strong wood glue for this job, but an image of the type in our illustration can be secured with any common paste)
- » Before the paste is strongly set, gently peel away the backing sheet (or it too can become stuck). Be careful not to lift up
the thin paper. Inspect the surface carefully, to ensure that the entire sheet is adhered well. Set it aside to dry.
Mirroring ... There is endless confusion among beginners to printmaking about ‘reversal’ of the image during the process, and I have seen any number of prints made with errors in lettering. The confusion can be dispelled in one simple paragraph: The preparatory drawing is done in correct, normal, orientation, with no reversal of any kind. This image is pasted face down onto the wood. The carved shapes - whether they be lettering, or pictures - are thus reversed from real life. Once printing begins, the block is inked, and the printing paper is also placed face down onto the surface. When it is pulled off the wood, the lettering and imagery on the paper thus appear in normal orientation. The preparatory drawing has been ‘cloned’. So there it is - while you are preparing your image, no reversal is necessary. You can now simply forget about this for the rest of your printmaking career. Just draw what you want, in the normal orientation.
Cutting
Cutting the key block for a traditional Japanese print is not a random process, but one that breaks down naturally into a few stages, each with a particular goal, and each utilizing its own particular selection of tools.
The Three Stages
- » Cutting the lines : For this stage, only a single tool is used - the beveled cutting knife. Both sides of each line in the design are cut, separating what will become waste, from what will remain.
- » Clearing major waste : A selection of larger chisels and gouges is used for this stage, in which the bulk of the unneeded wood is removed. On harder woods, a mallet is usually used to drive the chisels. The tools are kept a short distance away from the previously cut lines. (Just how close to come is a battle between common sense and bravado!)
- » Cleaning up : A series of relatively small bull-nose chisels is used to remove that last strip of waste wood up against the lines of the image. The block is given a final once-over to remove sharp edges that may leave marks on the paper, and the registration marks are also cut.
Stage one : cutting the linespdf p.33

For most general work, a knife of from 4.5mm to 6mm is usually used. It is typically held in a fist-like grip, but when cutting softer wood - can also be held like a pencil. As can be seen in these images and videos, a finger of the opposite hand is used to steady and guide the blade, which is typically held at an angle, leaving the retained wood shaped with a slight bevel.
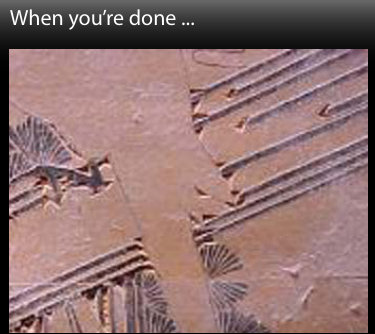
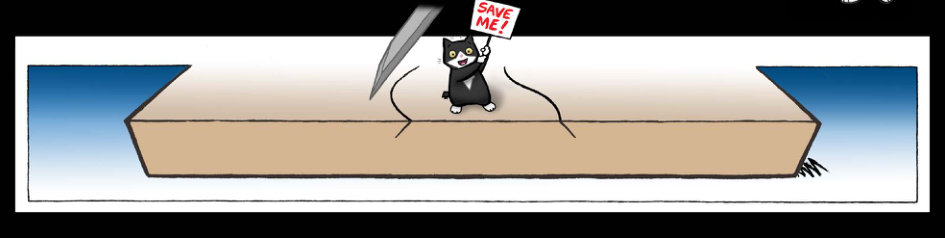
[Left-right confusions] - In the old days - I speak of the Edo era here - the basic strokes of the hangi-toh were made with the knife held in the fist, with the palm down, and the blade extending ‘outwards’ away from the body. The (always right-handed) carver leaned well over the wood and looked down over the back of his hand at the blade entering the wood (bottom right photo). This is not an intuitive method, but does allow a very high degree of accuracy and control once it is learned. The knife was forged in such a way that when held in this fashion the flat side of the blade was always against the wood to be retained. In the 20th century, when the modern sosaku printmakers be-
gan to do their own cutting, they picked up the same tool, and also grasped it in the fist, but held their hand with the palm
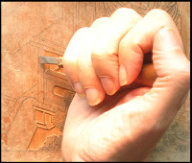
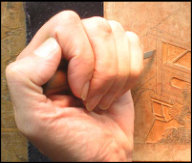
upwards, and the blade pointing inwards. This is easier for
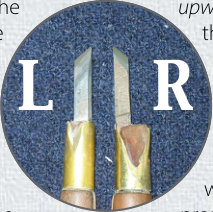
the beginner, but the bevel side now presses against the wood to be retained, thus damaging the edge of the carved area. The modern men didn’t care about this, as they were mostly using soft plywood anyway, and not cutting the detail that was common in the old days. But if your work is delicate enough that this will be a concern to you, arrange to get a blade of the proper orientation: a right-hander cutting on the ’inside’ will need a left-handed blade; a left-hander doing so will need a right-handed blade.
Correct use: right-handed blade Correct use: left-handed blade
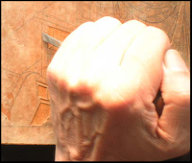
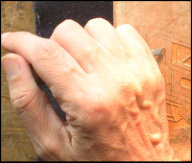
Stage two : clearing major wastepdf p.34

With all the outlines cut, it’s time to make the chips fly! This is the stage at which the bulk of the unneeded wood is removed. The primary tool for this is a wide and shallow u-gouge - the maru-nomi, although once you have a bit more experience under your belt, a good wide flatter chisel - a soainomi - is also very useful. On the hard cherry planks used by traditional carvers, such tools cannot be used by pushing with the hand, but on the soft plywood typically used by beginner printmakers, this is possible. Using a mallet though, does give better accuracy and stability, as the amount of force applied can be much more easily regulated. Hold the mallet up near its head to give a lighter ‘tap tap’ on the chisel, and switch to holding it down near the base of the handle when a full-stroke ‘whack’ is more appropriate.
Let the mallet do the work; your job is to guide and control where the cutting will take place. In the video above - which was made at my mother’s kitchen table (my brother and I made some of these videos while we were in Canada for a family reunion) - you can see that I wasn’t so well prepared, and didn’t have a non-skid mat available that day, so the block keeps trying to get away from me. I hope you can be a bit more sensible, and either find one of those mats, or fix up some kind of simple bench stop to hold the block in place while you are working on it. What’s that phrase that poor parents use to their kids .... “Do as I say, not as I do!” :-)
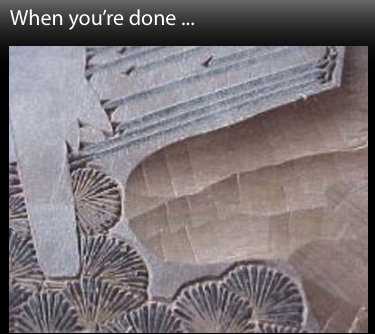
When I was planning the videos for this eBook, I got to a point where I had to make a decision: should I turn the camera on my own bench, and show how the work proceeds at a professional level, with hard cherry planks being carved in a very delicate manner? How practical would that be for people wanting to make a ‘first print’? But on the other hand, neither did I want to ‘dumb it down’; this book isn’t aimed at kindergarten kids. In the end, I decided to run both ways; on each of these carving pages, I have included two video clips, one made while I was working on my Hanga Treasure Chest series a few years back - cutting beautiful cherry wood - and another one made specifically for this book, using the same kind of material that the readers are likely to be using, namely cheap plywood. It was an interesting experience working with the student materials. The plywood cuts astonishingly easily and quickly, and it is clearly the best way for a beginner to get a feel for the craft. But each finished block is nowhere near as long-lasting or stable as one cut from cherry, nor does it have the same inherent beauty in its own right. I have already discarded the blocks I cut for this demonstration; I will never throw away the Treasure Chest blocks. And if there was ever the demand, they stand ready to serve again, perfectly capable of printing thousands more copies of those designs. Maybe one day!
Stage three : cleaning uppdf p.35
Did you get through the first stage of cutting without chipping off one of the lines? And then passed through the second stage without smashing your chisel into a place where it shouldn’t have gone? Well, congratulations, but here’s the final hurdle - and it’s quite a bit higher than the previous two. You now have to clear away that strip of waste wood that snuggles up against the lines, and while you are doing so, you will soon discover what happens in those places where your original cut wasn’t quite deep enough ... Pop! Off goes a segment of the line! There are two things you can do to minimize the number of times this will happen during your ‘first print’: the first is to (you know what I’m going to say) keep your chisel fairly sharp. This way, it will slice along smoothly, with a minimum of struggling and pushing. The second is more ‘mental’; simply try and feel a bit ‘ahead’ of where your chisel is actually cutting - as though you were clearing mines or something like that. You should actually be able to feel when the line is about to chip, and can pull back, pick up your cutting knife again, and re-cut the line in that place just a tad deeper, allowing the wood to slice away cleanly. I don’t want to lecture you about this, but a bit of care here will greatly improve the appearance of your finished print.
Here’s another video from Grandma’s kitchen ... you should be able to get a good idea of the general kind of motion, and the way that the work proceeds. And I didn’t even chip once!
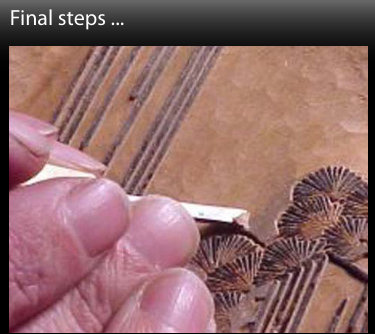
One point that frequently goes overlooked in discussions of woodblock cutting is the treatment of the ‘unwanted’ areas of the blocks. It has become customary with contemporary printmakers to leave the bottom of the cleared area very rough, with all the ridges formed by the u-gouges to be left in place. That’s not my taste, and as this is my book, I feel free to encourage you to spend a bit of time and generally get that area smooth and clean. This isn’t from any obsessive desire for control and ‘order’ (at least not much!), but comes from experience. Ridges on the bottom of the cleared area collect pigment from the brush as it sweeps past, and during the course of printing some dozens of prints in a batch, this pigment builds up to the point where it starts to touch the surface of the printing paper. Nothing is more disheartening than to find problems surfacing towards the end of a print run, when you are sure that you fixed them all back at the beginning of the batch.
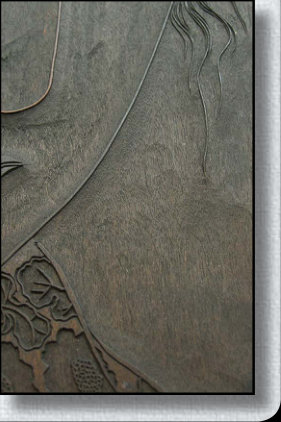
Colour Separations
Back in the Edo period, woodblock prints were made by a number of men working in collaboration. The process would start with a publisher, who would hire a designer. The drawings turned in by this man were then edited into a form suitable for carving, and the subsequent hanshita (tracing) - at this point just the outlines of the image - would be sent to a cutting workshop. There, it would be worked on by a number of men, with the most experienced cutters of course doing the most delicate parts of the image. Working sheets taken from the finished key-block were returned to the publisher, who would - in the case of expensive work - consult with the designer about the colours to be used. The photo here is of one such work sheet, and contains notes by Utamaro, one of the most famous of the ukiyo-e designers. His input into the colour separation process? Scribbled notes about colours and patterns: “yellow, purple pattern, flesh tone, green, shiny black, peonies with scrolling leaves, crimson stripes ...”, etc. etc. These simple notes would be passed back to the cutters’ workshop, where these skilled men would decode and expand the barebones information and produce a complete set of blocks for making the final multi-coloured print. The stage we are about to undertake - preparing the colour blocks for our print - will follow the old procedure, although in our case, instead of passing the sheets around town for decisions to be made, you’ll be doing everything yourself!
Making the separationspdf p.37
The picture here illustrates what is known in Japanese as a kyogo. It is an impression taken from a finished key block, printed in thin sumi ink. A thin but strong paper is used for these kyogo. In the old days a thin minogami was used, but as this is extremely difficult to handle, and the slightest error will make the resulting colour blocks useless, I use a slightly thicker paper called hodomura, which has the necessary characteristics for making good kyogo - it has a smooth front surface allowing fine detail to show, it is not overly subject to expansion and contraction, and after being pasted down it is readily abraded and peeled from the back (to clarify the image when cutting). How many kyogo will you need? One for each colour block. This is not necessarily the same as the number of colours in the finished print, as in some cases two or more colours can be included on one kyogo.
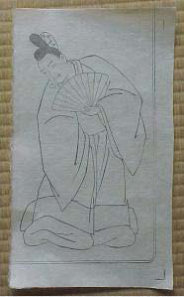
As I mentioned in an earlier section, these transfer sheets are printed in a different way than ‘real’ prints. When printing a kyogo, the paper is laid on top of the registration marks (which are also brushed with pigment), rather than slipped into them. The registration marks thus appear clearly on each kyogo, and it is then a simple matter to carve matching registration marks on each colour block. Once the batch of impressions has been printed, use a marker, take each sheet one by one, and ‘colour in’ area(s) where you wish a particular colour to appear in the print. (The colour of the marker used for these kyogo has absolutely no connection with the colours that will appear in the final print. It is chosen for clarity. In the ‘old days’ a vermillion pigment was commonly used.) Sometimes there are areas needed on colour blocks that are not strictly defined by outlines - for example, the tone on the slope of the mountain in this print, as well as the cloud shapes. These are simply drawn freehand. A single kyogo can be used for more than one colour, if the areas are separated by enough space to allow brushing at printing time. The usual ‘rule of thumb’ is the width of three fingers side-by-side, although this is obviously a matter of personal choice and convenience. The same area may be filled on more than one kyogo; these indicate places on the finished print that will be receiving colour from more than one block (overprinting). The striped areas that you see in these photos are actually intended to be solid colour. But as the marker I am using leaves quite a ‘wet’ trace, I am using the stripes to minimize any possibility of getting distortion in the paper. When the sheets are all done and checked for omitted spots (a very common error), they can be pasted face down onto new blank blocks in the same manner as the original hanshita (tape one edge, apply glue, lay it down). Then, while the glue is still slightly damp, a great deal of the paper fibre can be peeled from the back of each sheet, making the lines much more visible. Once they are all in place, and the glue has dried thoroughly, it’s time for more carving!
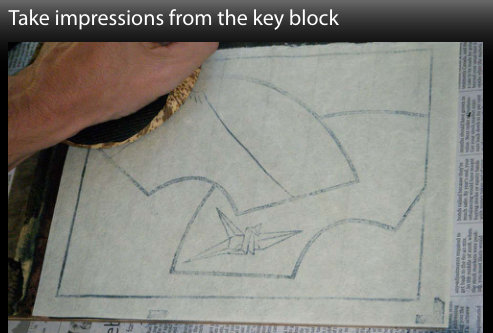
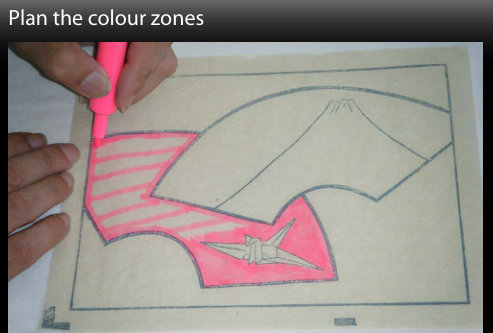
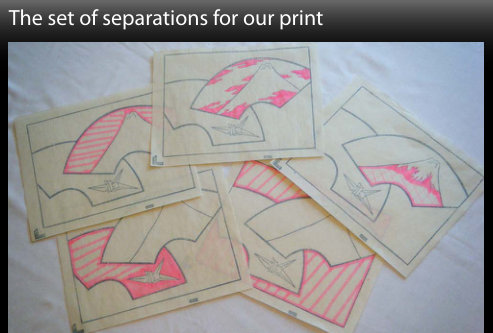
Carving colour blockspdf p.38
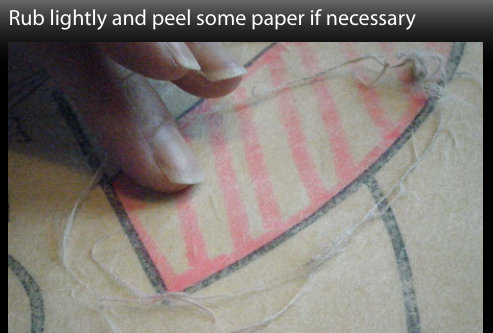
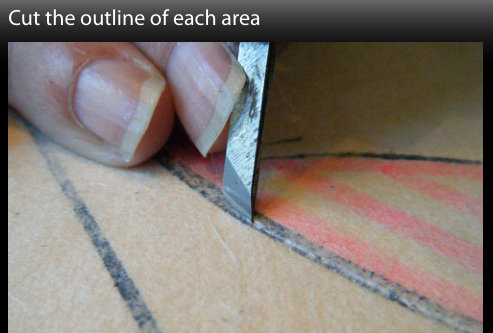
Colour block carving is basically the same as carving the key block - the same three steps are used, but as there are no outlines to cut - only masses - the cutting moves along much more quickly. Begin by using the knife to cut around the outside of each colour area. Keeping the flat face of the blade against the wood that will be retained, hold the blade at about the same angle as that used for regular carving, and cut just a little bit ‘outside’ the centre of the line.
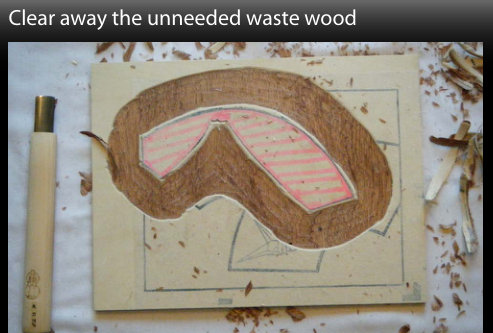
Once all the outlines have been cut, the next step is to use a marunomi to cut a shallow groove just outside each colour mass. Then clear away the unneeded waste to a distance of about 4cm out from the wood that will be retained. When the bulk of this waste has been removed, the aisuki chisels are used to trim away that left-over zone between the channel carved by the marunomi and the line incised by the carving knife.
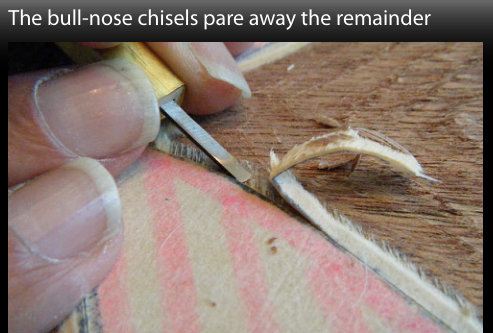
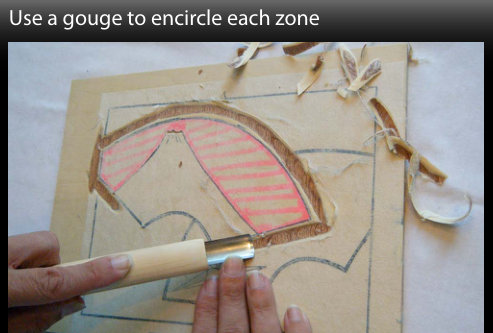
After this is cleared away, go over the surface of the carved-out area with the aisuki, paring away any sharp ridges left by the clearing chisel. If not cleaned off these will collect pigment from the brushes and may be the cause of blots on the print. Take it to the sink and wash off the remaining paper. No need to soak the whole block, just wash/wipe the printing surface.
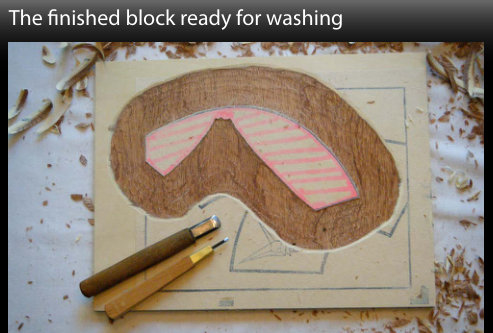
Printing
I mentioned on an earlier page that prints in the old days were made in a collaborative process, and even stages that would seem at first glance to be ‘one-man’ jobs were frequently done by teams. This was particularly true when the job at hand was time-sensitive, and in the case of prints featuring actors or fashion beauties, this must have nearly always been the case. Once the blocks were in the printers’ workshop, one of the most experienced men would be designated to print the key block, as any slight deviations in this part of the process meant that subsequent impressions would be difficult, or impossible, to align properly. After the key was printed, the sheets could then be worked on by a number of printers simultaneously, and even jobs of great complexity could be ‘turned around’ very quickly. That sort of collaboration doesn’t happen much these days, as even those of us working on old-style reproductions usually prefer to work through a single batch of prints alone. Now that your block set is ready, that’s what you will be doing of course, and as a result, you will have complete control over the appearance of the finished work. Vivid colouring ... delicate colouring; precise printing ... rough printing; all the prints the same ... each one different; it’s all in your hands. Total control ... and total responsibility!
The Printing ‘Catch 22’pdf p.40
Interlude
For a beginner working alone without advice or instruction, the printing process can be very frustrating. Here’s a rough description of how I remember my own first attempts at trying printing:
- Everything is in place, as best as I can figure it out
- So, put some pigment and paste on the block, start to brush it out over the wood
- Hmmm .... the block seems too dry; put more water on it. Wait for a bit ... seems OK
- Brush out the pigment mix again. No idea how much I really need ... Anyway, seems OK
- All right, time to print. Put the brush down, reach for a piece of the paper. It’s difficult to hold! Try to get it located in the registration marks ... takes time ...
- (The block surface has now dried in places, but Dave can’t see that ...)
- Get the paper in place; start rubbing. But can’t see where to rub, because the paper now blocks the view of the carved surface!
- How long to rub? How hard? Who knows ... Anyway ...
- Peel off the paper (which is now drying at the edges).
- Look at the result. Total disaster. The block was dry in places, and the baren banged unwanted areas.
- Study it to try and do better with the next sheet, but while ‘thinking’, the block is drying even more.
- Dump more water on the dry wood ...
- Put some more pigment and paste on the block. How much? The first impression seemed too light ...
- Repeat X times, alternating between ‘block too dry / block too wet / too much pigment / not enough pigment’ ... etc. etc.
What happens is that instead of your ‘car’ rolling down the road in a generally straight line, you career wildly from side to side, trying to find the ‘correct’ balance between the ingredients. But because you are constantly pausing to try and ‘figure it out’, the condition of the block and paper changes. You are trying to hit a constantly moving target! The basic problem is that water-based woodblock printing cannot be done slowly and with hesitation; it is just impossible.
So what are you to do? It’s kind of a ‘catch-22’; you can’t move smoothly and quickly because you don’t know what you are doing, but because you don’t move smoothly and quickly, the results are awful. There is an easy answer - before you start some ‘real’ printing, you have to practice the individual ‘steps’ of the process, focussing particularly on the two steps that cause delays: placing the paper, and rubbing the impression. Read through the instructions on the next few pages carefully, and before you start splashing pigment or water around, work on getting the motion of the steps memorized. First get yourself to the point where you can pull a sheet out of the stack, slide it into the registration marks, and lay it down onto the block in just a couple of seconds (do this at first with just sheets of dry paper - and no pigment or anything - just practice the paper movements). Then, learn where the ‘target’ area of that particular block is, so that even once it is covered by paper, you can work accurately with the baren without banging into unwanted areas. Only when you have got these two steps down pat - and it will only take a few minutes - should you actually start trying to print.
Then, once you do start, you must discipline yourself to keep moving and not stop to fool around with unnecessary things like inspecting your work! I know ... I know ... without looking at the result, how can you tell whether or not you are using enough pigment, etc. etc.? Well, of course you must look at each sheet as it comes off the block, but you do this while you are slipping it into place face-up on the ‘receiving’ stack. “Hmmm ... seems too faint; I’ll need more pigment next time.” or “Ohh ... way too dark! I’m putting much too much pigment on!” Make your mental adjustment quickly, and keep moving!
To add to the ‘bad news’ - even a top professional printer knows that the first few sheets off the block are not going to be ‘correct’. In his batch of (say) 200 sheets, the first few will be trial sheets that he uses to get things ‘primed’. For the beginner, who is perhaps working with only a few sheets anyway, it is next to impossible to get a satisfactory result. By the time you nearly get primed, you’re done!
But there is a way around this conundrum. At this first trial stage, don’t even think about starting with your nice Japanese paper. Just use any old household paper ... ‘copy paper’ ... whatever. (Newsprint is a bit too flimsy and difficult to hold.) Don’t even bother pre-moistening it. We’re not looking for a ‘beautiful impression’ at this point we’re just trying to train you through a sequence of physical motions, and these sheets will go straight into the trash can once we’re done.
So here’s the drill. You will repeat this process for each of the blocks in your first print:
- Practice getting a sheet onto the block quickly, accurately and smoothly, using the “Look Ma, no thumbs!” technique that I will outline for you a couple of pages from now.
- Practice finding the hidden printing area with your baren.
- Then ... prepare a stack of ten sheets of your junk paper.
- Moisten the block with your water brush. Let it sink in a bit, moisten again, wait a bit ... Depending on your wood, it should take no more than a few minutes to get it basically primed.
- Let’s go! Splash on some pigment, add some paste, and brush it out across the block. Because you set up your workplace in the way I recommended - with a light shining off the block directly up into your view, you can easily see how the wood is holding the moisture. Make sure you hit the entire area, and once it looks ready, move quickly to the next step, before it can start to dry out.
- Pull the top sheet from the stack ... place it ... rub it. Because you’ve practiced this already, it should move along smoothly.
- Pull it off, and grab a quick look while placing it face up on the receiving stack.
- Keep moving! Go, go! Start again, and continue ‘round the cycle until the ten sheets are done. Down towards the bottom of the stack, you will perhaps start to feel the ‘rhythm’ of the work ... Once you’re through the ten sheets, now you can sit back, inspect them, and start your ‘analysis’. It will almost certainly be the case that the early sheets in the stack have a fainter impression than the later. If you started with a clean brush, it had not yet become ‘charged’ with enough pigment; an experienced printer (you, soon!) will charge it with pigment and paste even before trying the first impression.
There may be many problems with the ‘prints’, there may be few. (A section on ‘troubleshooting’ follows below). But by sticking to this routine, you have eliminated the single greatest point of frustration for the inexperienced printer - the problem of paper and/or block drying out while you fiddle around. Even a professional printer dreads pauses - a ringing phone means a break in the rhythm, with a consequent ‘re-start’, trying to get the moisture back to where it was.
It might be that in my enthusiasm for encouraging you to keep moving, you may end up feeling a bit ‘frantic’, but believe me, once the rhythm starts to ‘click’, things will settle down and you will be able to move forward smoothly and peacefully, without the slightest stress or ‘panic’.
What comes next? Either have another run with some more junk paper, or ... if you feel like this first result wasn’t a complete disaster, try it again, perhaps slipping a couple of nice sheets of properly moistened good paper at the ‘bottom’ of the stack. It’s your call, but hopefully by following this training process, you’ll be able to get a handle on how to control many of the variables, without letting them get away from you.
Over the following few pages, we’ll look more closely at the actual mechanics of each of the steps ...
Moistening paperpdf p.41
Before the actual printing can begin, the paper must be moistened. There are two main reasons for this: (1) if we tried printing on dry paper, it would expand unevenly as it absorbed the water from the blocks, and registration of multiple colours would then become impossible; and (2) the pigments will not ‘sink in’ properly if the paper is too dry and ‘hard’. Given that a ‘good’ moisture level in the paper is absolutely critical to producing good impressions, I can’t emphasize too much that you should really try and keep it under control, and the method outlined here should help you do that. I’ll describe this on the assumption that we’re going to do a batch of 20 sheets, but I use the same method scaled up for over 200 sheets with no problems.
- Do the first moistening at least a few hours before printing begins (the night before is ideal). Prepare some newspaper ‘sections’ that will serve as interleaving. Mine are usually 4 sheets thick (imagine a mini-newspaper numbered from pages 1~8). For our sample batch of 20 printing sheets, we’ll use five such interleaf sections.
- Using a basin of water and a mizubake (if you don’t
have this specialist’s brush, a wallpaper brush or wide, clean paintbrush will do), brush water over both sides of two of the newsprint sections, and lay them down as the base of the ‘stack’.
- Now do 10 of the printing sheets. If the paper is thick and heavy, brush water over every sheet. For most typical Japanese printing papers, wetting every second sheet is fine. Stack them up right on top of each other.
- Cover these with another newspaper section (wetted both sides), then do the next 10 printing sheets, then finish off with the final two newspaper sections. We now have more newspaper in the stack than we do printing paper. The idea is to provide ‘inertia’; we want the overall moisture to change as little as possible as we move through the printing process, and this helps us reach that goal.
- Slip the stack into a heavy plastic bag and let it sit for a while.
- If the paper size is quite small, that’s pretty much it, but if the dimensions are relatively large, or if the design contains small-scale elements that make registration critical, then a second step is necessary. The moist-
ened paper needs to be allowed to expand freely as it absorbs the water, but while held tightly in that stack, it is unable to do so. So after a couple of hours, it must be re-stacked in a different orientation to allow free expansion.
- Working fairly quickly, not to let the paper dry out, open the stack and ‘shuffle’ the printing paper sections into a staggered arrangement as shown in the photo here. Stacking them ‘heads and tails’ is not a bad idea either - anything that will help moisture equalize across the sheets will help. This is also a chance for you to gently brush on a bit more water if you feel that the sheets are still too dry. What level of dampness are you aiming for? The printing paper should end up about like a sheet that has just come out of the spin drier ready for hanging on the clothesline - damp yes, but most of all soft. Once it’s ready, the paper is placed in position ready for printing. The entire stack is placed on the table with the paper in face down orientation, so that each sheet can be smoothly slipped out in turn onto the waiting woodblock.
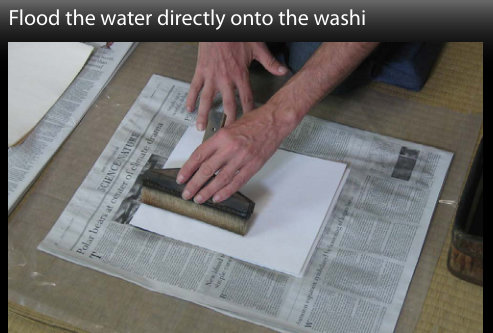
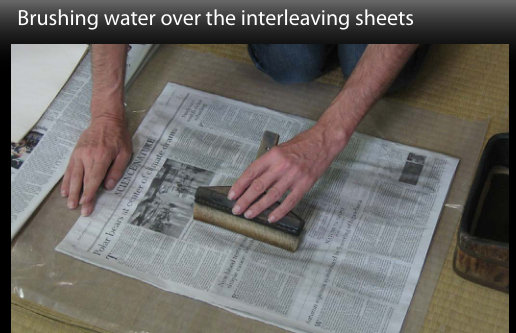
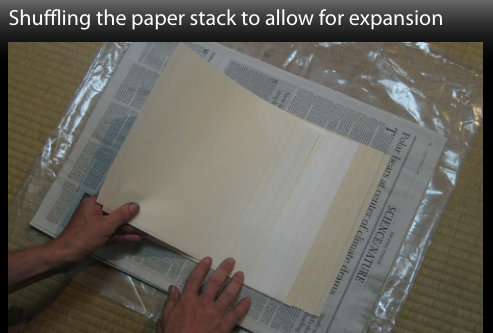
‘Ingredients’pdf p.42
The amount and balance of the pigment and paste (and their dilution) is what determines the saturation of the colour in the print. You have complete control. It’s rare that the amounts being placed on the block stay mechanically exact during a print run. You’ll usually start with rich amounts, as the brush is empty and the block is clean, and then pull back a bit as the amounts start to build up. Wide block areas will of course need more material than smaller ones, sometimes much more.
- Start by using the stick to drop a dollop of paste onto the surface of the wood.
- Next, use the hakobi applicator to transfer a swab of pigment - the quantity will depend on the saturation you want in the result.
- (optional) You may need a bit of water if the block seems too dry, or to thin the pigment.
- Use the brush to mix the ingredients together and spread them over the wood surface. Dig in! No pussyfooting! Brush vigorously to spread the mix around. The colour and paste must be spread thoroughly over all the raised portions of the block. Add more pigment or paste if there doesn’t seem to be enough.
- Make sure you run right over the edge of the printing areas, but don’t rub places outside the ‘valley’ we previously carved around the design areas.
- For the final strokes, pull back on the pressure and brush lightly, in straight lines across the grain, to smooth out the mixture. This will reduce the likelihood of paste streaks in the impression.
Don’t fool around using tiny brushes. If the brush is too small, it won’t hold enough pigment to cover the area, and some places will dry out before others are covered. A brush ‘too large’ will not be a problem, and actually the pigment ‘reservoir’ that it holds will help you keep things consistent from sheet to sheet.
You must have a good light shining onto the work area. Under this illumination, you should be able to see a smooth, glossy layer covering the block, with no patchy dry areas, or excessive streaks. Once it seems to be ready, move on immediately to the next step before it starts to dry.

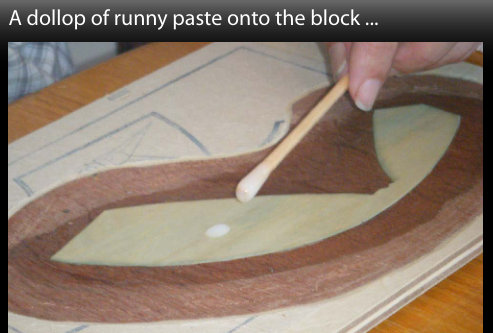
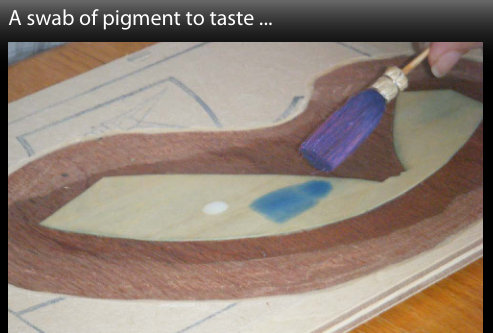
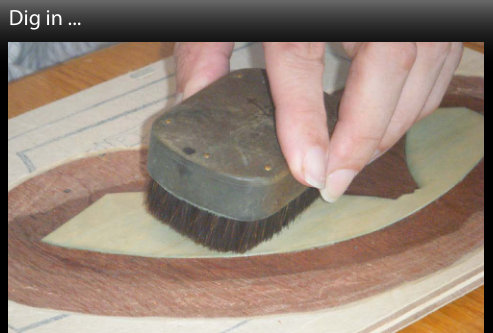
Placing the paperpdf p.43
This is one step that you are going to have to practice until you get it right. If you are clumsy at this part of the process, your prints are going to suffer major problems: - you will have endless trouble with uneven impressions, due to the delay in getting the paper placed quickly onto the block. - your prints will always have registration problems, due to poor paper positioning on the wood. Here’s how it works:
- Tease the top sheet from its place in the input stack
- Hold each side between index and middle fingers. No thumbs!
- Position your hands such that your thumbs will be able to reach the registration marks
- Keep slight tension - and a curve - on the paper, to stop it from flopping down (with wet paper, this needs practice!)
- Lower the paper into the corner mark ... confirm visually that the paper is nestled exactly in the corner ... and then lock it in place with your thumb. Don’t let go!
- Now lower the paper into the horizontal mark ... confirm that it is firmly against the wood ... then lock it with your thumb. Don’t let go!
- Slide your middle fingers out from under the sheet, ‘rolling’ it down into place on the block as you do so. Keep it locked with your thumbs!
- Keeping your left thumb in place, to hold the sheet, let go with your right hand and reach for the baren
- Gently touch down with the baren - over the printed area, not an empty area - to make contact with the pigment, then start rubbing (see next page). Practice this. Practice this. And practice some more! If you can get this procedure down pat, the rest is a piece of cake!
Always touch with the baren to make the first contact on the back of the paper. Never use your fingers, as you will almost certainly push the paper down into a valley, leaving a blot. A professional printer will never have occasion to touch the back side of the sheet with anything other than the baren. Ever.

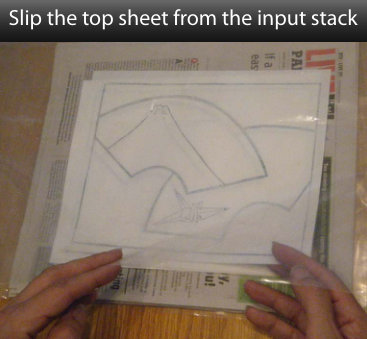
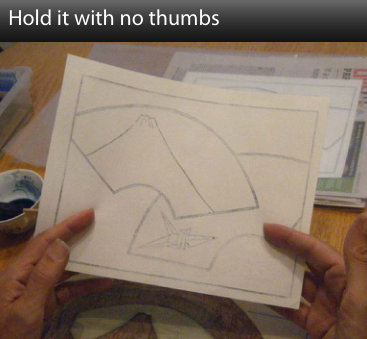
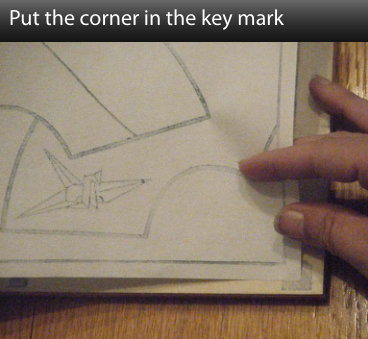
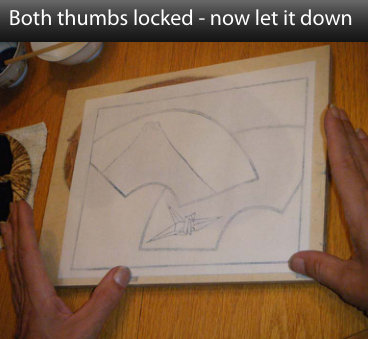
Taking the impressionpdf p.44
The rubbing begins with a few gentle strokes moving towards the corner registration mark (to avoid pulling the paper out of position). Once the paper seems to be securely in position, the main rubbing begins:
- Make horizontal strokes to get the paper firmly pressed against the pigmented block
- Then use a series of small and tight circular motions to make the main pigment transfer
- You need to run the rim of the baren past the edge of the carved zone, to ensure complete transfer. (But of course, too far will result in disaster ... This is why you practiced on the block before starting the real work!)
- How long to rub? That’s easy - stop when you’re finished! There is no general rule - rubbing past the point where all the pigment has been transferred doesn’t really do any harm, so do a thorough job of it. Peel up a corner of the paper and take a peek, if you wish. If it’s a dry day though, you don’t want that paper to be exposed to the air for an overly long time ... General points to note:
- Your fingertips go under the cord, and pull it tight
- The pressure is applied with the base of your palm, not in the area under your fingers
- Depending on the paper condition, the baren may need frequent ‘touch-up’ oiling (discussed earlier)
- Keeping the paper locked with your other thumb helps a lot when the printing area is small, and the paper tends to slip
- How much pressure to use? It depends. Thick and drier paper will need more, thin and/or damp will need less. But it can be hard work! You are a human printing press! Areas of small size, blocks with delicate detail, or ‘unsaturated’ mottled printing, will require very light pressure, but wide areas of deep colour on large blocks will have you sweating after just a few impressions.
These photos show a block being printed on a kitchen table. Compare with the photo on a previous page, you can see that my own printing bench is sloped slightly away from me. This is for exactly the same reason that the traditional cutting bench slopes towards the worker - to keep the angle of the forearm perfectly aligned with the work being done. If you are going to do a large amount of printing - for larger editions, say - it would be an excellent idea to explore this, and perhaps make a small angled stand on which to place the blocks. Your wrists will thank you!

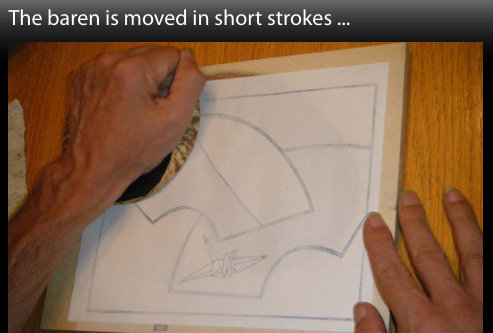
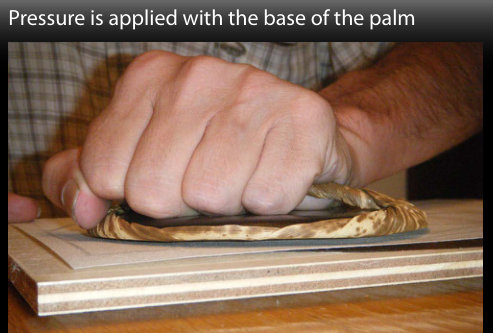
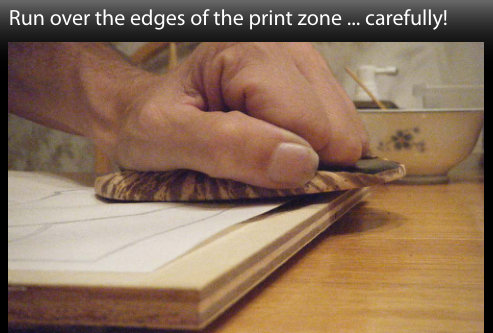
Moving to the next sheetpdf p.45
Once you feel that all the pigment has transferred to the paper, put down the baren and pull the sheet from the block.
- The paper should come off the block in a smooth rolling motion; avoid producing creases, as they will be permanent
- The paper is placed face-up on the ‘receiving’ stack. Make a quick ‘inspection’ as you lay it down: - how is the basic quality of the impression? - are you maintaining consistent colour/saturation? - is the registration still OK?
- Creep the sheets, to help equalize the moisture across the entire print
- Stacking the sheets ‘heads and tails’ also greatly helps to keep the moisture balance even, as the freshly printed zone frequently ends up being ‘sandwiched’ between unprinted areas. One sheet is no sooner tucked away in the receiving stack, than your hand must immediately reach for the pigment applicator to start the next one. Even seconds of delay will have the block starting to dry out in places, making the next impression problematic. Keep moving! As you come to the end of each group of sheets in your input stack, flip the exposed damping sheet over onto the receiving stack, and continue work with the next group of printing sheets. Once you’re at the end of the whole run, and all the sheets and damping papers have been transferred from the (now empty) input stack to the (now full) receiving stack, the two packages are simply exchanged, with the receiving stack being flipped over to become the new input stack - in proper face-down orientation for starting the next colour. This system also ensures that your sheets will cross each block in the same order - from #1 onwards. The first few sheets end up being ‘tests’ for the batch, and most of your errors will be concentrated in those few prints ... hopefully!

Under normal circumstances, there is no possibility whatsoever of the printed sheet smearing or transferring in the receiving stack. If the pigment/paste balance has been anywhere near close to correct, it will have all been driven down into the paper, and there will be nothing left to smear (nor will there be anything left on the top surface of the wood.) You can impress any onlookers by actually rubbing your fingers (lightly!) across the face of the printed sheet after you lay it down on the stack. They will gasp in amazement as they see that nothing smears!
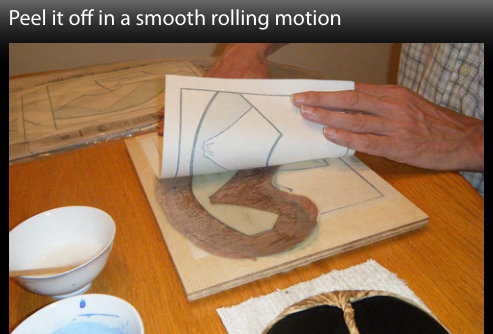
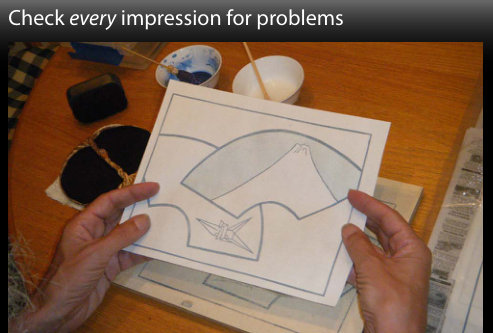
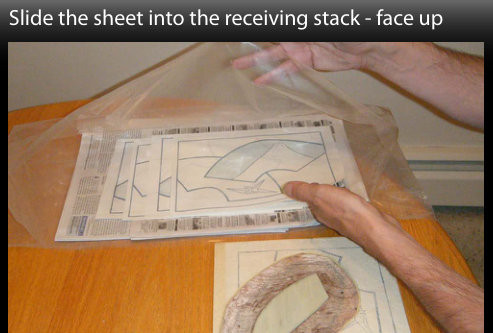
Gradation printingpdf p.46
The normal printing process uses wet pigment and paste, placed on the wood separately, and then mixed together well by the brush and spread across the entire surface of the printing area. Gradation printing also involves leaving a mixture covering the entire surface, but with one major difference - the pigment part of the mix is confined to a limited area. Paste (and water) make up the material on the rest of the block. This is achieved by limiting the motion of the brush in such a way that pigment generally stays where it was put. I say ‘generally’ because some of the colour inevitably migrates out from that area, and it is this migration pigment creeping out to mix with the water/paste - that produces the gradation. The process begins by using a rag to ‘pre-moisten’ the area of wood where the gradation will appear. Rather than use a loose cloth, most printers use a small block of wood with a rag wrapped around it (held in place with pins, a rubber band, or a spring clip). The cloth is moistened before work begins, and is wetted again as needed as the printing progresses. The size of this block of wood will depend on the particular design being printed, but a
typical one is about the size of a deck of cards. Slide it across the wood, following the ‘line’ of the gradation. There should not be any loose water left standing on the surface, but the wood should be thoroughly moistened. Move along quickly, before this moisture either dries out, or soaks in ... Then use the hakobi in the normal way to apply some pigment to the block, keeping it only in the area where the colour is needed. Using a brush with a length that will allow it to cover the entire zone of gradation (from colour to nothing). Hold the brush face up for a moment, and apply paste to the end where there will be no pigment. Begin rubbing the brush on the block - but unlike the normal pattern of rubbing in various circles and swirls - rub only in a side to side motion along the line of the gradation. As you brush back and forth you will see the pigment being drawn into a gradation with the paste, just as the paste will be drawn into an invisible gradation with the moisture on the block. There should be an unbroken smooth transition between pigment ... paste ... and moisture.
When it seems to be ready, print the impression in the usual way, rubbing the baren across the entire carved zone, not just on the portion containing pigment. When you repeat on the next sheet - make sure you remember which end of the brush is which! Do not allow the brush to become turned around, or you’ll get a real mess. Make a mark on one end of the brush, to help you remember.

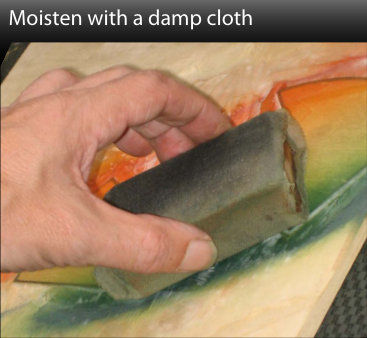
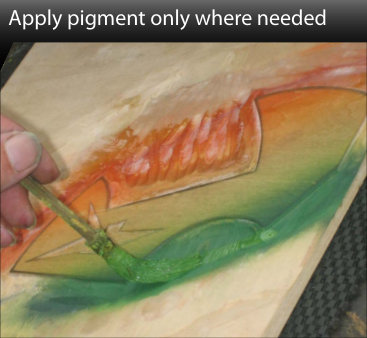
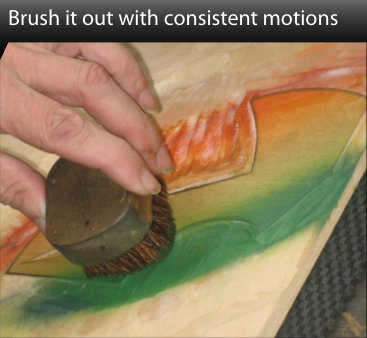
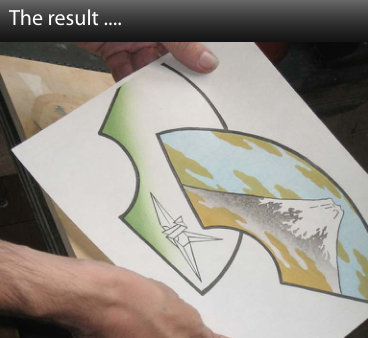
General printing managementpdf p.47–48
[Printing order] This is a point of much confusion for the beginner; “Well, where do I start?” A few guidelines can be stated clearly: - for a design with a traditional type of keyblock, that will come first. As the colours are presumably cut to fall within such outlines, those lines must be in place to allow registration to be checked and adjusted as the print develops. And because the black - the most common colour for the outlines - will cover all other colours, it doesn’t matter to the end result that it wasn’t printed ‘on top’ of them. Printing the outline block first does involve one complication; the black lines may subsequently ‘transfer’ to the wood of the following colour blocks. To avoid this, traditional printers will do the black key block one day, then let the stack rest overnight before proceeding with the colours. - a block with areas of solid black (like the hairpiece blocks in the old prints) will usually be printed last, as such blocks are printed with a stickier pigment/paste mixture, which would always transfer to other blocks whether or not it was rested, as mentioned above. - as a general rule, avoid following one colour with another that is positioned nearby (or overlapping), as
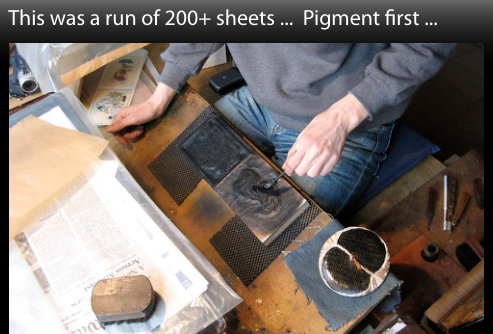
that area of the sheets will soon become over-saturated. (Stacking the sheets head-and-tails also helps a lot with this) - if any particular block requires extremely tight registration, only do it when the paper moisture is wellbalanced. Also, doing such a block early on will mean a minimum of wasted work if some of the sheets have to be discarded. - by printing bold, stronger colours first, the lighter ones can much more easily be ‘balanced’. If lighter ones are done first, they will almost always be found to be too light after their bold neighbours are in place. Some of these points may contradict each other, and there is no single ‘best method’ to follow. Experience will count of course, but until then, just follow your nose. Your single most over-riding concern should be keeping the moisture balance even.
[Moisture control] It cannot be over-stated - the degree to which the final print will be considered a success or failure is directly related to how well you maintain the moisture level through the course of the printing process. The ideal to shoot for - and which a professional printer will achieve every time - is for the moisture level to remain consistent from the time it ‘settles down’ shortly after the original moistening ... all the way through printing the (many) colours ... until the final one is done, and drying begins. Why is this important? Because any small difference in the moisture in the paper translates immediately into a dimensional change - the paper expands and shrinks and registration becomes impossible. And as discussed in the section on moistening paper, the quality of the printed impression depends greatly on the moisture being correct - too much water in the paper and your pigment mix will have no room to enter between the fibres; too little and the paper will be too stiff and hard. There are a few things working against you on moisture control: - when you print a fairly wide impression of colour, water is added to that portion of the sheet (only). - as you move the paper around in the open air during the printing process, water evaporates from the (entire) sheet. - because of the dynamics of paper stacks, both the
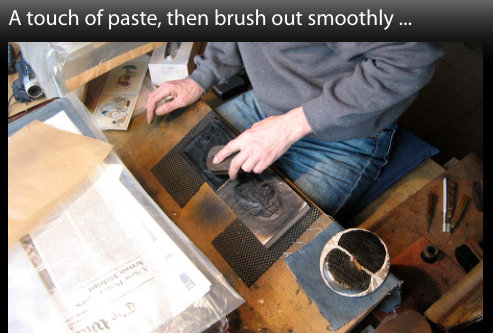
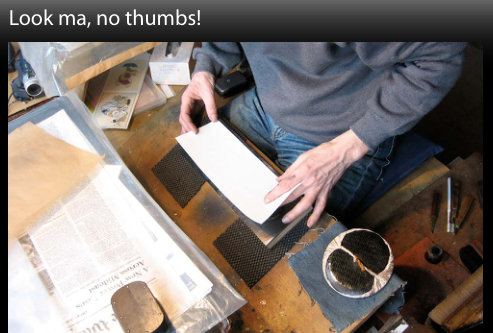
(continued from previous spread)
printing paper and the damping sheets tend to start drying around the edges. If your climate is particularly dry, you may have trouble keeping the paper properly moist. Here in Japan, where the humidity varies widely as the seasons change, ‘winter printing’ and ‘summer printing’ require different management. It will help a great deal if you keep the stack of paper ‘staggered’, with the sheets offset slightly from each other. Turning them heads-and-tails is also very effective, and for me, this is ‘standard operating procedure’ with every print I make. It means that pulling the sheets out for printing is slightly more troublesome, as half of them will be ‘backwards’, but this slight annoyance is far and away offset by the benefit of the equalized moisture.
[To add moisture] Use your large water brush to add moisture around the edges of the damping sheets as you work through the stack. It isn’t usually necessary to add moisture directly to the printing sheets themselves, although a touch-up around the edges is sometimes needed in winter. Don’t add moisture to the ‘input’ stack, but to the ‘receiving’ stack; by the time the sheets come back around for printing, they should be ready again. (This is only true when the stack is large, and a print run takes time. If you have only ten sheets in there, you may have to take a break sometimes while the moisture equalizes) [To reduce moisture] Temporarily insert sheets of some other paper between your prints. A few minutes at a time is usually all that is necessary. If your ‘wet spots’ are localized, then use sheets trimmed roughly to the appropriate size. Another thing worth mentioning, based on what I have seen at various workshops/meetings I have attended, is that inexperienced printers are frequently ‘careless’ with their paper stacks. The damping sheets are unevenly moistened (and usually too few), the plastic cover is open to the air here and there, and the prints are usually scattered in random order. These people are perhaps thinking, “Oh, I’m only doing a few sheets ... it doesn’t really matter.” Well, it does matter. A well-balanced stack is a pleasure to print, and the results will be under your control; a careless stack is nothing but trouble. Believe me, if you are an inexperienced printer - which I presume is why you are reading this book - make the effort to learn to keep your stacks smooth, well-ordered, well-balanced, neat and clean, just like the pros do.
[Drying the prints] If you have been generally successful at maintaining the overall moisture balance of the sheets during the course of printing the batch, then at the end of the run they will still be flat and smooth. They will also be quite soft, and any creases or knocks introduced at this stage will be permanent, so handle them with a great deal of care. The prints can best be dried between stiff sheets of flat card. To avoid introducing waviness as they dry, it is best to do it in two stages: first put the prints two-by-two back-to-back between the drying boards along with loose sheets of another paper to absorb most of the moisture. Then, after about 10~15 minutes, go through and pull out the loose sheets, which should have picked up a great deal of the excess moisture. If the printed paper is still very wet, use yet another set of loose sheets to remove more moisture. Doing it this way should stop the main drying boards from curling with the moisture, and everything should stay basically flat.
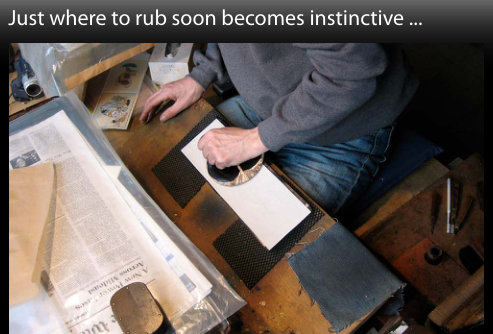
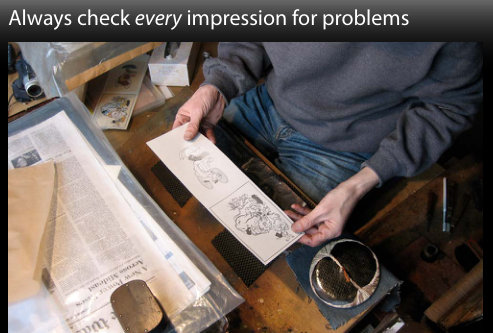
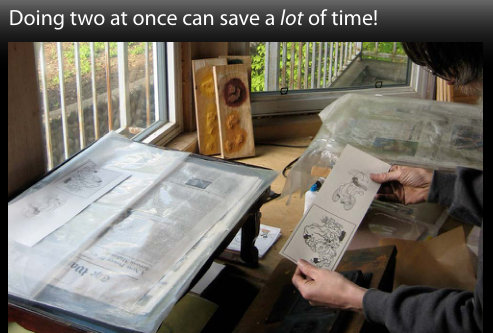
Troubleshooting
I’m not being very optimistic, am I, having a section on ‘problems’ in this manual! I think though, that this is not being so much pessimistic, as realistic. It’s going to take you a while to get fluent with the different parts of this craft, and having a guide to help show where you might go wrong, and how to fix it when disaster strikes, should be helpful I think. The most common problem encountered by the beginner carver is chipping off parts of the lines. The most common way the beginner carver will try to fix this is with wood putty. This almost never works; even if the physical shape of the missing piece is restored, the fact that the putty doesn’t accept moisture the same way as the surrounding block guarantees that the ‘repair’ will be visible in the finished print. I’ll outline the ‘proper’ way to handle such repairs here, and would really urge you to give it a try - it’s actually quite simple and straight-forward, and it is very satisfying to make your own ‘invisible’ repairs! For the printer, there are many many more ways to go off the rails. Getting the block moisture, pigment moisture, paper moisture, brush moisture, paste thickness, baren pressure, etc. etc. all ‘correct’ and in balance is not easy for the beginner, and it can be quite frustrating trying to figure out exactly what factor is responsible for any particular problem seen in the print. Experience is the only real solution for this, but the sample ‘problems’ shown in this section should help a little. And I’m including a page on registration adjustments, which can be quite confusing. Even after around three decades of printmaking, I still find myself moving the registration marks the ‘wrong way’ sometimes, and have watched men far older than myself make the same error. There just seems to be something about it that resists easy interpretation. That may be small consolation to you when you too, get it wrong, but at least you’ll know you are in good company!
Block repairspdf p.50
Even the most skilled cutter sometimes needs to make repairs to the block, perhaps from a moment’s inattention causing a chip, hitting a bad patch in the wood, or making a design change after something was carved. Because wood is so infinitely ‘shapeable’, even quite extensive repairs are not a major problem. Amateurs may first think of using a wood ‘filler’ to patch the chipped section of a line, but because of the difference in moisture absorption between the filler and the neighbouring wood, the repair will be clearly visible in the finished print. The proper way is to plug the damage with the same sort of wood, and if this is done with a reasonable amount of care, the repair will be utterly invisible. The photos here outline one common method of plugging a block:
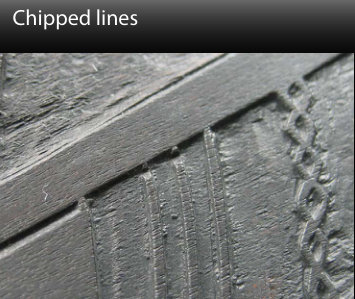
- As it is very difficult to work with tiny slivers of wood, don’t be afraid to cut back the damaged area to a more manageable size. And consider cutting back to a place where there is a ‘joint’ or place in the design where a slight gap would not be unsightly. I like to cut a slot in the wood that matches exactly the width of one of my chisels, thus making it much easier to fit the insert piece.
- Using an offcut of the same type of wood as the block, cut a piece for inserting into the new hole. It should fit snugly, but without strong pressure, to avoid causing damage to neighbouring sections. It should stick up above the level of the block at this stage, and should extend beyond the printable area; don’t try to shape it perfectly yet.
- Once it is fitted properly, put a dab of glue in the bottom of the hole, gently tap the plug into place, and set it aside to dry. Once you get more experienced at this, you can try cutting the sides of the slot at an over-hanging angle. The plug can then simply be moistened and tapped into place, without needing any glue.
- After it has dried thoroughly, pare down the top surface with a chisel until it matches the surrounding area.
- Re-cut the line. It’s better to cut a bit ‘wide’ at first, and then trim it back after proofing.
- That’s it! Please don’t be afraid of this; making a block repair - especially when it ends up invisible - is one of the most satisfying parts of the job!
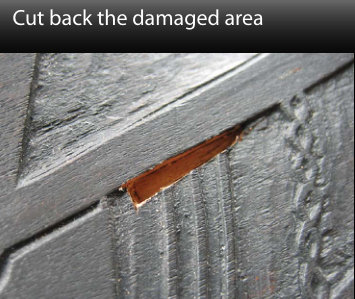
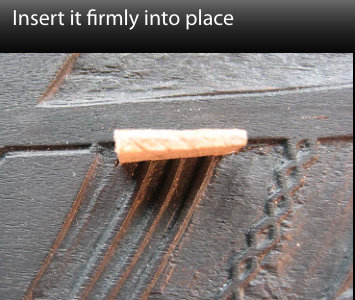
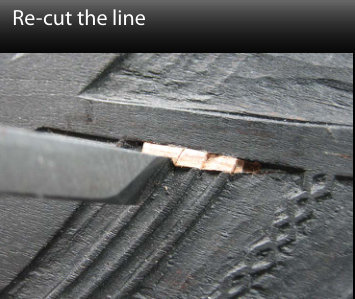
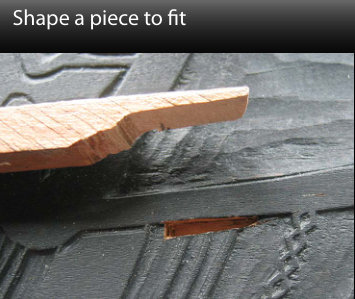
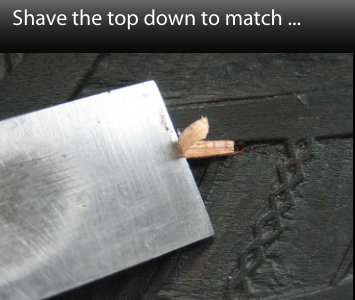
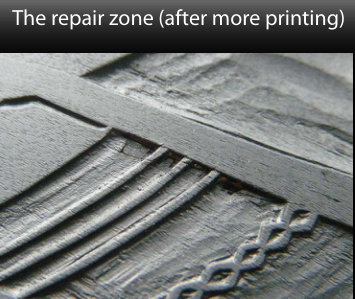
Registration problemspdf p.51
As you work through a batch of prints, the constant application of moisture to the wood can cause it to expand, throwing the registration slightly off. Or perhaps during the time that it takes you to print an entire edition, a change in the weather and humidity causes something in the paper/block balance to get out of whack somehow. It is not uncommon at all, for the registration to need adjustment during the course of a print run. This is one reason that the keyblock is printed first in the Japanese tradition; most of the old prints had very fine lines, and the margin of tolerance for registration was on the order of tiny fractions of a millimeter. But with the keyblock printed first, subsequent colours could be made to fit, through constant adjustments of the registration marks. We never see an old block without evidence of these adjustments; it was simply part of the printer’s routine - move the marks in - or out - as required at any moment. You never move the marks on the keyblock; that stands firm as the ‘baseline’ for the whole process. But the confusing part of these adjustments is that, in order to fix a problem like the one in the photo above, we will adjust the registration mark on the colour block, but by doing so we are moving the key line - not moving the colour. To make that blue sky fit inside the fan outline, the fan must move down, not the sky move up. So the registration marks on the blue colour block simply need to be trimmed back by the same amount of mis-registration. Now that’s an easy example - trimming back the registration marks. You just cut away a bit of wood. (Do it bit by bit of course, taking test impressions to see how things are lining up.) But when the adjustment is the other way around, you need to add wood, and that’s more complicated. The photos here show the classical procedure using a ‘kui-ki’, a sliver of hard wood driven into a slot in the block. Professional printers here in Japan keep little sticks of cherry wood for this job handy at all times, and are so good at making the adjustments that it would rarely take them as much as a minute to do one. And when you look at an old colour block - what a ‘forest’ of little shims you find in that corner!
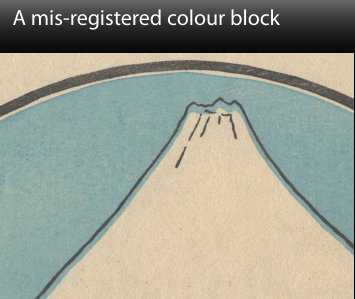
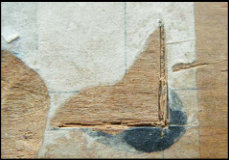
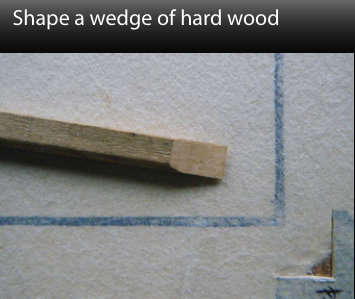
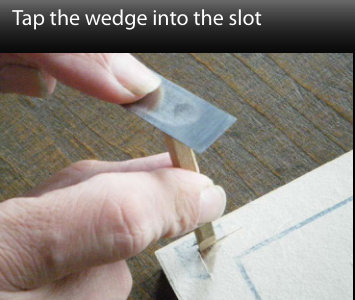
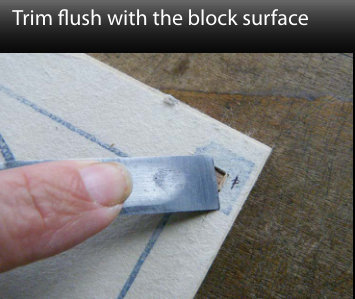
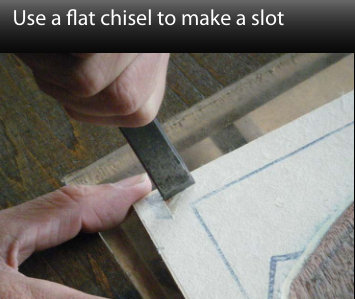
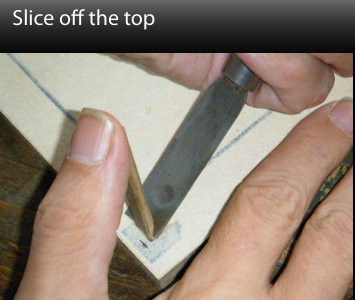
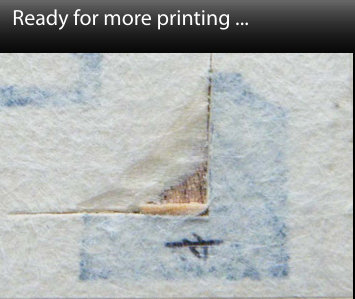
Printing problemspdf p.52–53
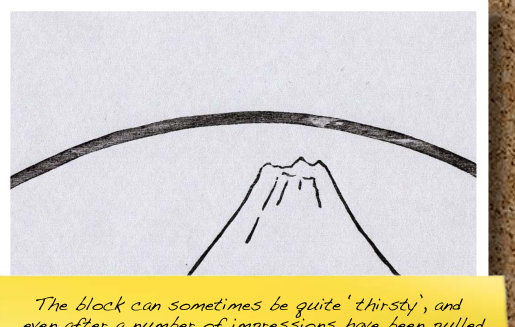
In contemporary woodblock printmaking, there are no ‘printing problems’. An impression of pale mottled colour, which would have been ‘wrong’ for an old-time ukiyo-e printer of old, may be ‘just right’ for a modern image. So when writing this section, I have to remember that what is a problem in one place, is actually a solution in another instance. But having said that, I am basically a traditional printmaker, and if you were my apprentice here, you would start by learning how to print perfectly smooth colour, with no trace of any mottling. Once you could do that reliably, you would then be ‘allowed’ to put some texture back in, as required. The big difference would be that it would now be completely under your control, and not ‘accidental’. Here are some images of some common things that go wrong while printing ...
This one looks at first like a patch caused by a dry block, but it is actually a place where the printer didn’t rub the brush thoroughly enough; this is common at the edges of printing areas. Keeping a light positioned so that it ‘bounces off’ the block up into one’s eyes is essential for avoiding this trouble. Any such patches show up clearly under the light.
Blots like this are the bane of every beginner, and can have one of two causes: they are either areas that were not cut deeply enough (in this case they will appear on each print in the same place), or they are places where you pushed the paper down, either with the baren or perhaps your finger. Don’t ever touch the back of the sheet!
The mottled effect on the side of the mountain here is caused by a ‘too wet’ printing surface. Either the pigment mix was too runny, or perhaps there was too much water in the brush. Or because this was a gradation - printed on a moistened block - perhaps the wood surface was too wet.
Marks left by the coil of the baren are known as ‘baren-suji’. They can of course be used as an intentional effect. In the example here, if the printer had continued rubbing longer, making sure the baren covered the area with repeated passes, the marks would have eventually blended together into a smooth impression.
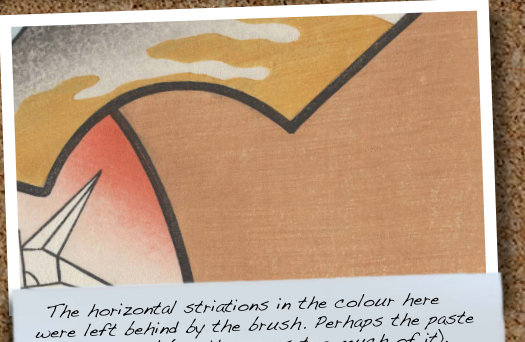
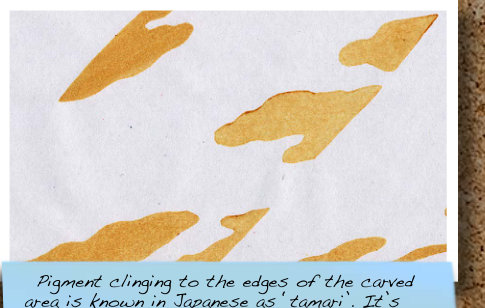
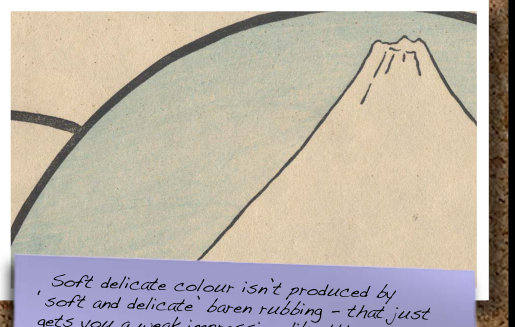
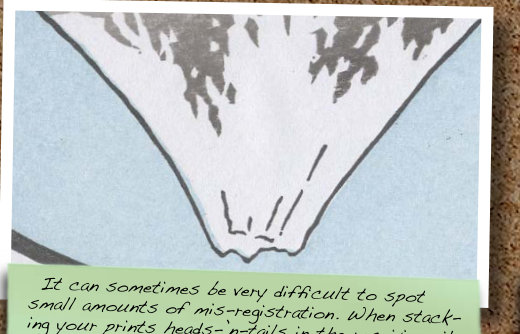
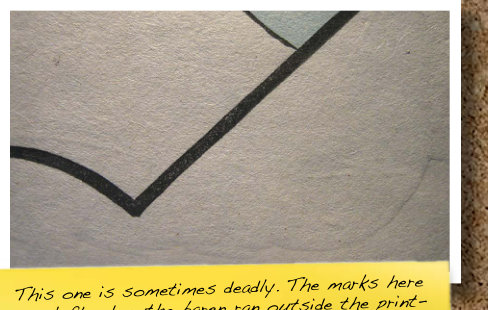

Appendix
So we’ve come to the end of our exploration of the traditional Japanese printmaking process. It is of course a question of immense interest to me just how many of the readers of this little book will now go ahead and ... you know, make some prints! I can’t expect that it will be everybody; after all I myself have a variety of instruction manuals sitting on my bookshelves here, but I have read most of them simply for general learning about the particular topic, with no intention of actually doing it. (I will never build that boat!) But having said that, I do remember back around thirty years ago, picking up a little book on woodblock printmaking in a used bookshop somewhere. It didn’t give very much practical information, nowhere near as much as has been presented in this book, but it did whet my interest, providing one of the sparks that led to me eventually becoming a full-time woodblock printmaker, living in a strange country ‘far away’. It gives me great pleasure now to think of my little book going forward, being read by people in years to come (although I have to ask, where are the interesting little shops filled with dusty ‘used’ eBooks?), and hopefully sparking some future young man’s interest in printmaking, just the way that the book I found did for me. For those who are ready to begin though, I will list some supply sources for tools and materials in this section.
Supplierspdf p.55
When first mapping out the general content of this book, I set aside this page for a listing of places where readers could obtain the supplies needed for making their first print, and then began to collect the information. I soon realized though, that this was not such a good idea. Although it would be easy to do some quick internet searches, make notes of names, address, etc. etc. and create a listing here, this wouldn’t be providing any value that readers couldn’t obtain for themselves. The fundamental problem is that I myself have no experience at all in dealing with the kind of suppliers that would be useful to you, the beginner printmaker living somewhere ‘overseas’. I know about some of them, but how could I recommend them to you, having never dealt with them myself? Where then, do I get my own supplies? Well, I get all my printing paper from a single workshop in a small village in the mountains of Fukui Prefecture. I buy it in large batches made to my special order, and they do not accept orders any other way, even if I were to give you their address. I get my pigments from a little shop on a back street of the Kanda district in Tokyo, and when I dropped in one day recently and asked them about having their contact information listed here, they waved me away. They do not speak English, have no experience at all in dealing with people outside Japan, and have no interest at all in exploring such an idea. My knife blades come from a couple of small blacksmithing operations, one of them run by a very elderly man, and he too cannot conceive of his little business in a ‘global’ way. And honestly speaking, tools and supplies of the type I am using are pretty expensive, and not really practical for the beginner. So I think that all I can do on this page is give you references to a couple of general tool/supply sources where I know that you will be able to find what you need. First on the list should probably be McClain’s Printmaking Supplies in Oregon USA. This is a family-scale business, with a couple of decades experience in providing supplies to printmakers, and they carry most of the tools and materials described in this book. Their website is: http:// www.imcclains.com/ (Tell them Dave in Tokyo says ‘hello’!) The other place that must be mentioned is Woodlike Matsumura, the most comprehensive single supplier of woodblock printmaking supplies here in Japan. Starting as a wood supplier years ago, Matsumura-san branched out to include all manner of tools and supplies. Although the main thrust of his business is the domestic Japanese market, in recent years he has produced an English language catalogue, and takes orders through an online shop. And that’s about all I am able to help you with. During the period that I have been testing early revisions of this book with a few friends and acquaintances, some of them have suggested that I myself start to offer tools for sale, but I think I’ll leave that be, at least for now.
I’ve pretty much got my hands full with my printmaking activities, and every hour that I spend ‘wheeling and dealing’ with suppliers, etc., is another hour that I don’t spend peacefully sitting at my carving bench creating the next new beautiful print!
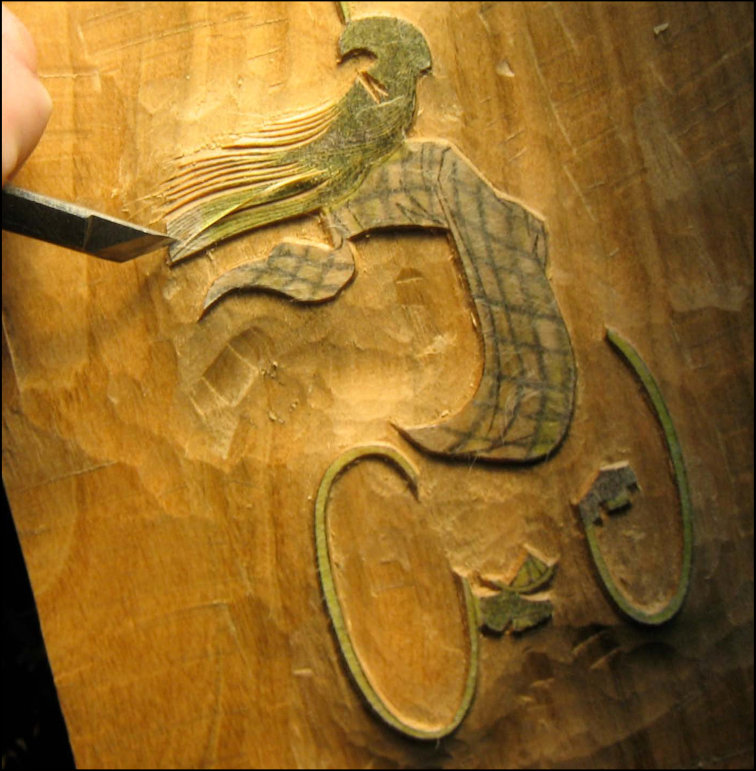
Afterthoughtspdf p.56
For years, I have been planning to issue an instruction book on traditional Japanese printmaking. On my website I have had the outline of an ‘Encyclopedia’ of the craft in place for more than ten years now, but the vast scale of the project has been quite intimidating, and I have only managed to fill in a very small portion of the content. One reason why I have not made much progress on that project is the general sense I have that I am in a stage of my life where I should be ‘doing it’, rather than ‘talking about it’. I don’t want to make any of my readers angry by bringing up that old cliché, “Those who can, do ... Those who can’t ...” but I have definitely held tightly to the feeling that getting down to my workshop and actually making stuff is the proper way for me to be using my time and energies in these years. When then, can my ‘vaporware’ Encyclopedia ever become reality? When I retire? Honestly speaking, I can’t see that ever happening. It would be foolish to try and predict the future, but I can well imagine ending up pretty much like Ito-san the carver, who we met earlier in this book. He worked well into his 80s, then one morning, literally fell over at the bench. A few days later he was gone. Now I’m of course in no hurry for that to happen to me, but one day ... it will, I guess. So, a while back I started to think about how I could get something moving on the book project. And I had a good idea. Instead of trying to climb that vast mountain - the ‘Encyclopedia of Traditional Japanese Printmaking’ (which I estimate will run somewhere around 800 pages at least), start with a smaller project. Put together a basic framework of information that would guide a beginner through a first simple project - the kind of book that I would have killed for back when I was just starting out. Then, using that as a ‘base’, think about issuing supplementary volumes to it later, volumes that would expand and build on the techniques outlined in the first one. So that is what I decided to do. And by setting down that strict limit - to stick to the minimum amount of information necessary to get through one’s first print - I have managed to actually get the thing finished. No more vaporware - it’s done!
But why an eBook? Why not a traditional paper volume? After all, modern colour printing is extremely cost effective these days, and has never been cheaper (or of higher quality). Well, ‘cheaper’ it may be, but there is still no getting around the fact that there is quite a substantial investment necessary to get a few thousand copies of a nicely printed (and full colour) book into print. And with the extreme pressure to keep prices down that we encounter at the sharp end of the retail book business (Amazon), the chance of ending up in the black is very slim indeed. The choice was actually very simple: to have gone for a traditional book would have needed a huge investment, and would have brought marginal returns (if any). To do it in eBook format is something I can handle completely by myself, from concept through content creation, design, production, and marketing. And as the costs at every stage of that chain are minimal nowadays, the only investment necessary has been my time. Another factor has been a consideration of what is about to happen in publishing. I am convinced that electronic publishing will become a tidal wave in the next few years. Handheld readers that display content like this in clear easy-to-read fashion will soon be commonplace and ubiquitous, and everybody will own one as a matter of course. Well, there is no sense waiting until that day is here; I might as well jump out to the front of the pack! (But it certainly is a bit of a twist - such cutting-edge media being used to disseminate information on an ancient craft!)
A couple of notes about the production of this book: - Although I hired a professional video crew to visit my studio for filming, some of the videos and photos in this book are ‘hand-made’ - taken for me by my brother Simon and daughter Fumi during the course of our annual family reunion this year. If you listen closely during some of the carving scenes, you may even hear my parents chatting in the living room as we worked at the kitchen table. But I think that for a book that purports to show how to make ‘Your First Print’, that’s a perfectly natural environment! - The illustrative graphics scattered here and there through this book are the work of British artist/animator Mark Mason, who is also responsible for the ‘Boots the Cat’ character, based of course on my feline companion here at the Seseragi Studio. I am thankful to him for being willing to work with me on this project, and I think you can expect to see some more of this in the future. We have plans! - Mr. David Coffin also provided invaluable assistance and encouragement when I was first struggling with ways to present this material. He introduced me to the Rich- Media pdf format, which he is using successfully to instruct people in the fashion field. - A number of friends put up with my constant badgering for ‘testing’ during the time that I was putting all this together. Marc Kahn, Jacques Commandeur, Maria Arango and Julio Rodriguez all helped in this way, and their input has definitely helped improve the final product.
🔗 www.markmasonanimation.co.uk
🔗 myvirtualworkshop.blogspot.com
And last but not least, thanks to all the purchasers and readers of this book. I certainly hope you find it useful!
Dave Bull, Tokyo Japan
Other productions ...pdf p.57
Annual ‘Gift Print’ In autumn every year, Dave prepares a presentation package of one of his small prints. It’s a beautiful little item, one that is always received with pleasure.
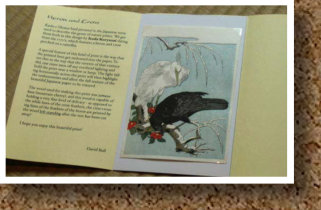
🔗 mokuhankan.com/catalogue/thumbnails.php?search_key=ebook



🔗 astoryaweek.com/en/index.php
🔗 mokuhankan.com/catalogue/thumbnails.php?search_key=general
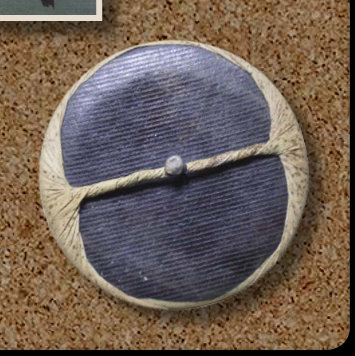
Epilogue
One final thought to share. Over the decades that I have been involved with woodblock printmaking, I have come to realize that there is a kind of paradox lurking at the heart of the whole process. This printmaking technology is - at its core - a method of creating multiple copies of a particular creation. In the old days, this wasn’t an esoteric ‘old craft’, but a living breathing normal part of the society of its day; the men involved with it were ‘printers’ in the same sense as the men who today work in XYZ Printing Company, Ltd., creating books, pamphlets, etc. and etc. The work was (and is) repetitive. By its very definition it is repetitive. To put out a batch of nicely made printed products requires the ability to pay close attention to detail, not for a moment, not for a minute or so, but for many sometimes mind-numbing hours. And then to do it again, and do it again, and do it again ... This is no world at all for a person of ‘artistic temperament’, the kind of person who will take a blank sheet of paper/canvas/film/whatever, grab a ‘pencil’ and spill his ideas all over it, creating something new and magical from nothing. Yet in the world of modern woodblock printmaking we ask these two people to exist in the same body, in the same heart, and the same mind. There are - to tell the truth - very few people who can actually do both of these things. And of course this is one explanation for the astonishing success of the Japanese prints of old. In those days nobody ever thought of trying to do it all alone; the prints were made by a group of experts, each specializing in one aspect of the whole. You and I, trying to fit two people into one body as we do, are fools who will never approach their level of mastery. But, there’s no reason we can’t have fun trying! Thank you for coming along on this journey with me, and I hope that you will continue with printmaking, and that this book will be of use.
David Bull, Seseragi Studio, Tokyo Japan
Autumn 2009